Easter Weekend Project – Displaying vinyl records simply and easily
This easter weekend I decided to make some progress on a project that has been bouncing around my head for a while, mounting some of my vinyl records on the wall in an affordable way. Here is the quick before and after shots, if you want know the details then just keep reading.
Before
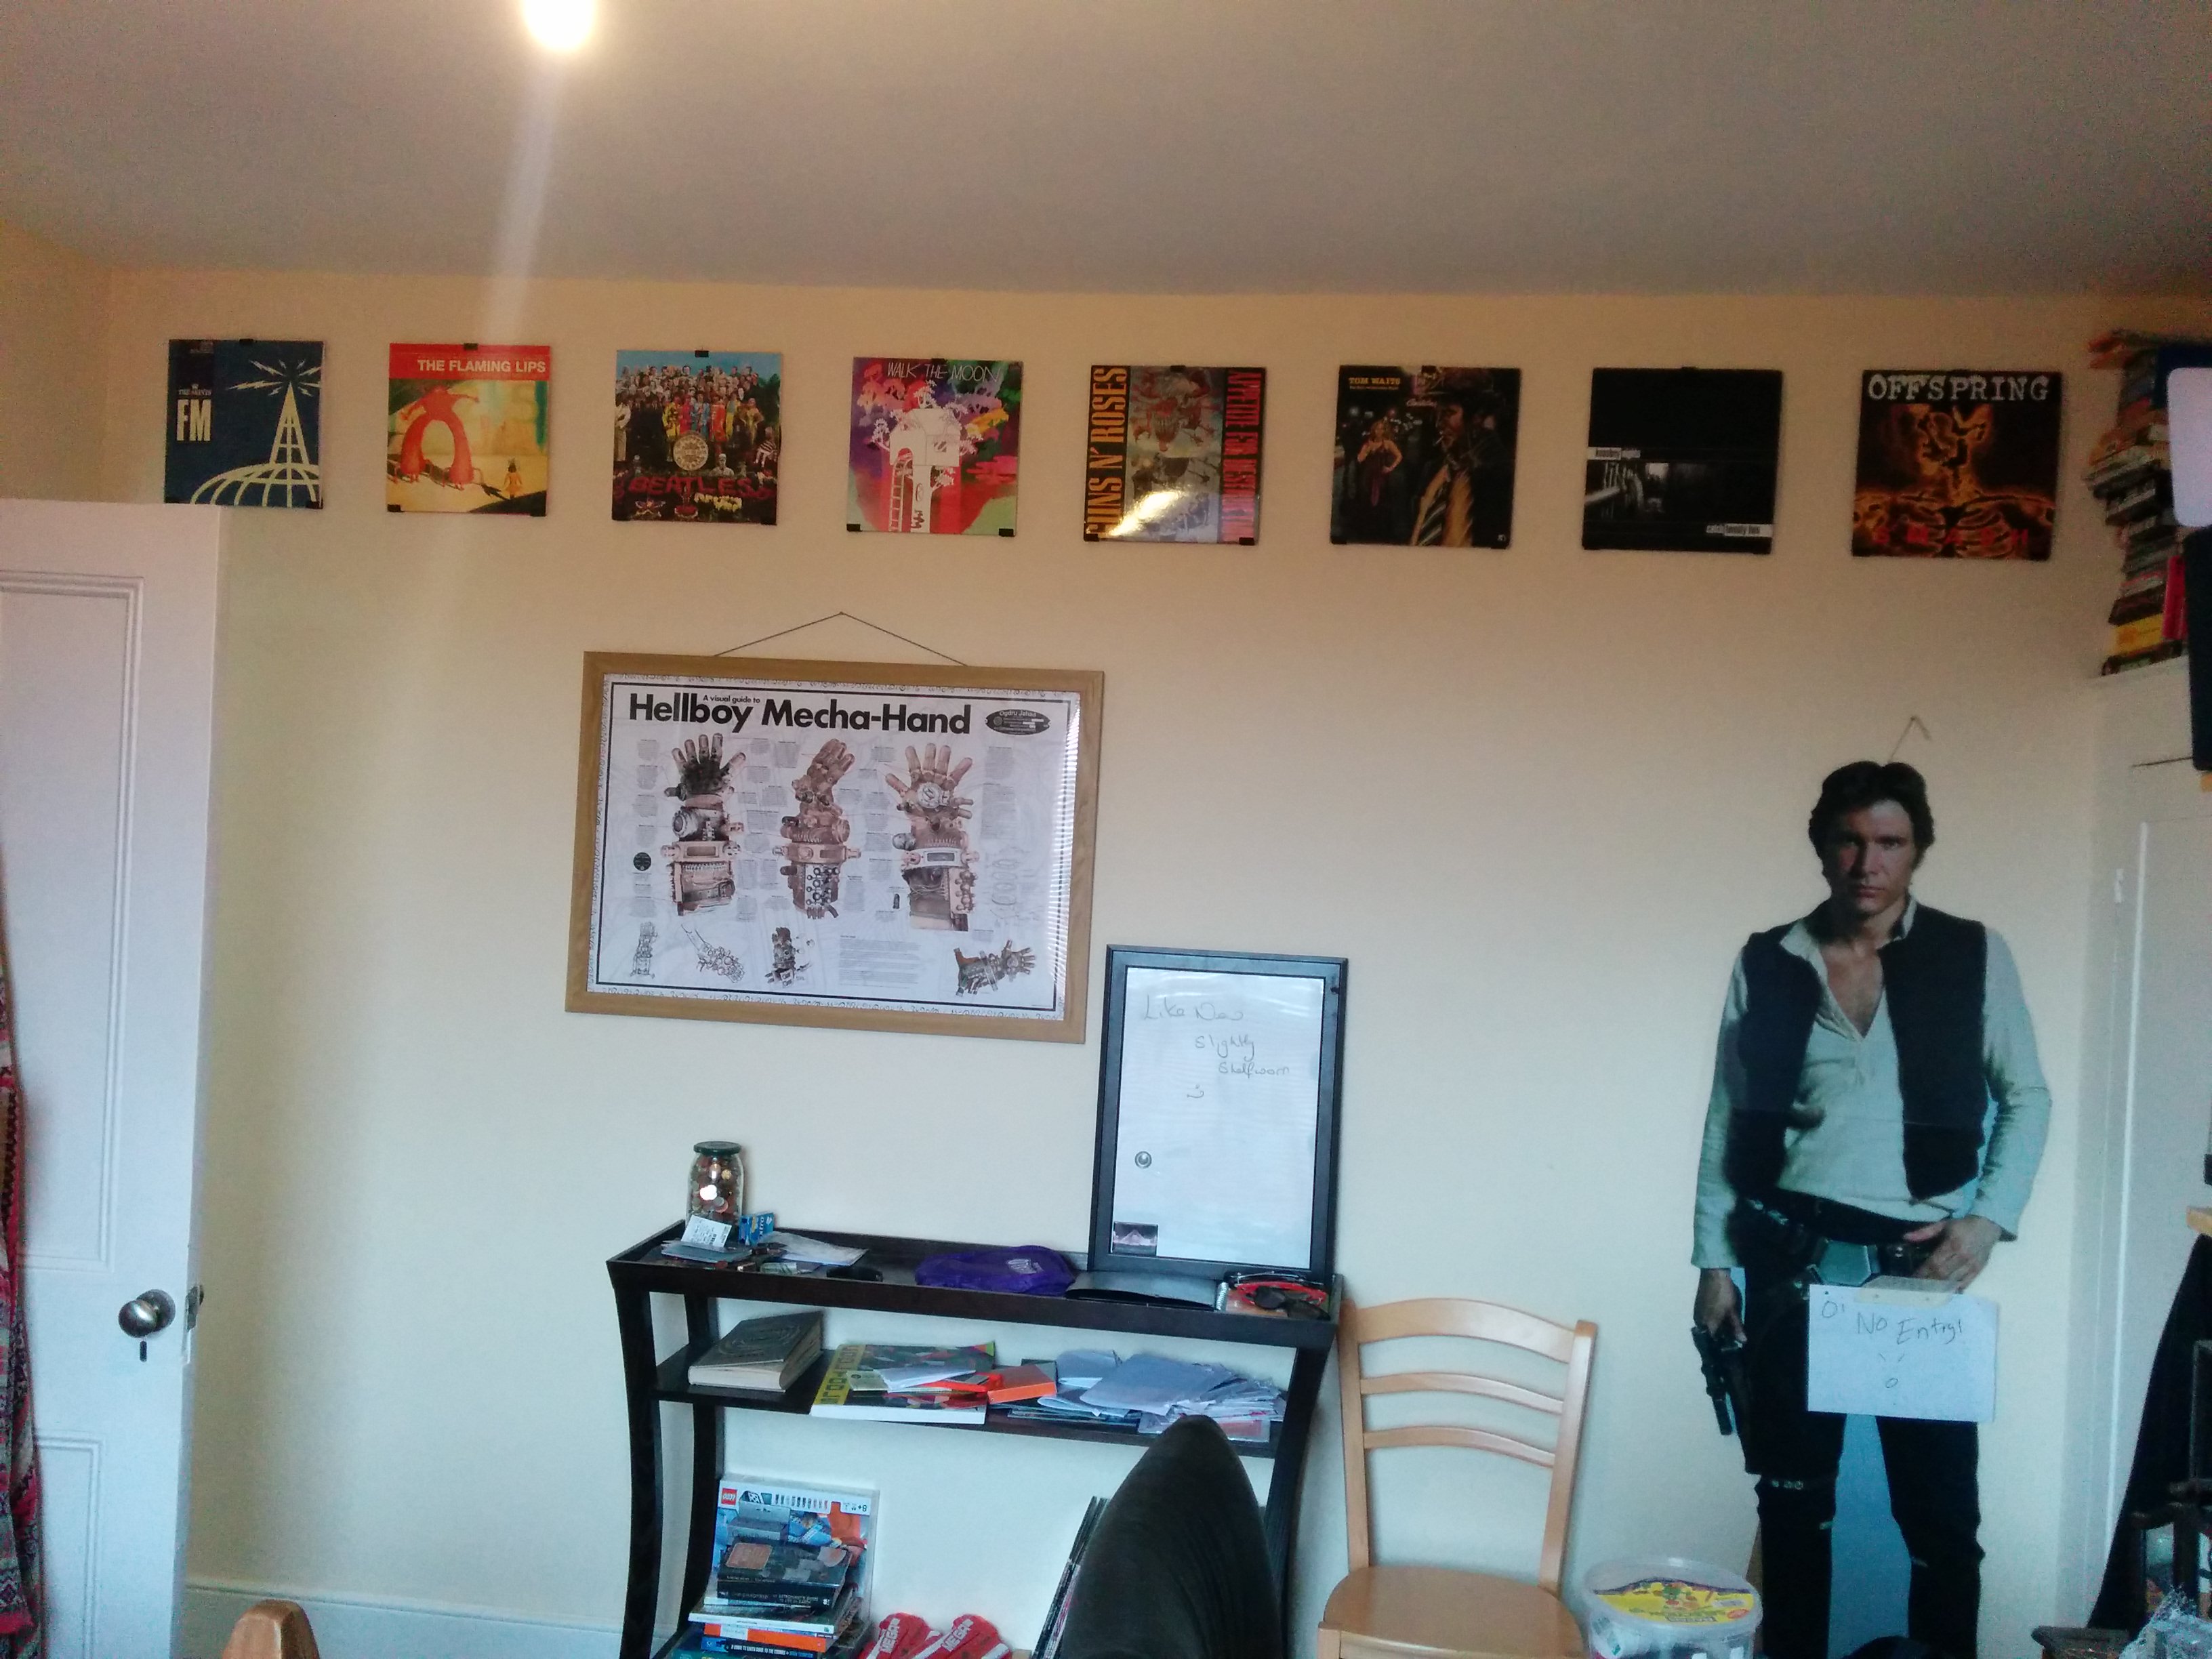
After
Details
Backstory
It all started a while ago when I saw this blog post and dutifully added it to the Eventually section of my Onenote, however it sat there for a while with only the occasional google search from me. The original problem I had was finding a good source for the ‘J Trim’ that was needed, I found a few sources online but who wants to have something that is 2.5meters long delivered. Recently during one of my all to frequent, late night, can’t sleep, investigating and adding to my ever growing list of projects sessions I came across the following…
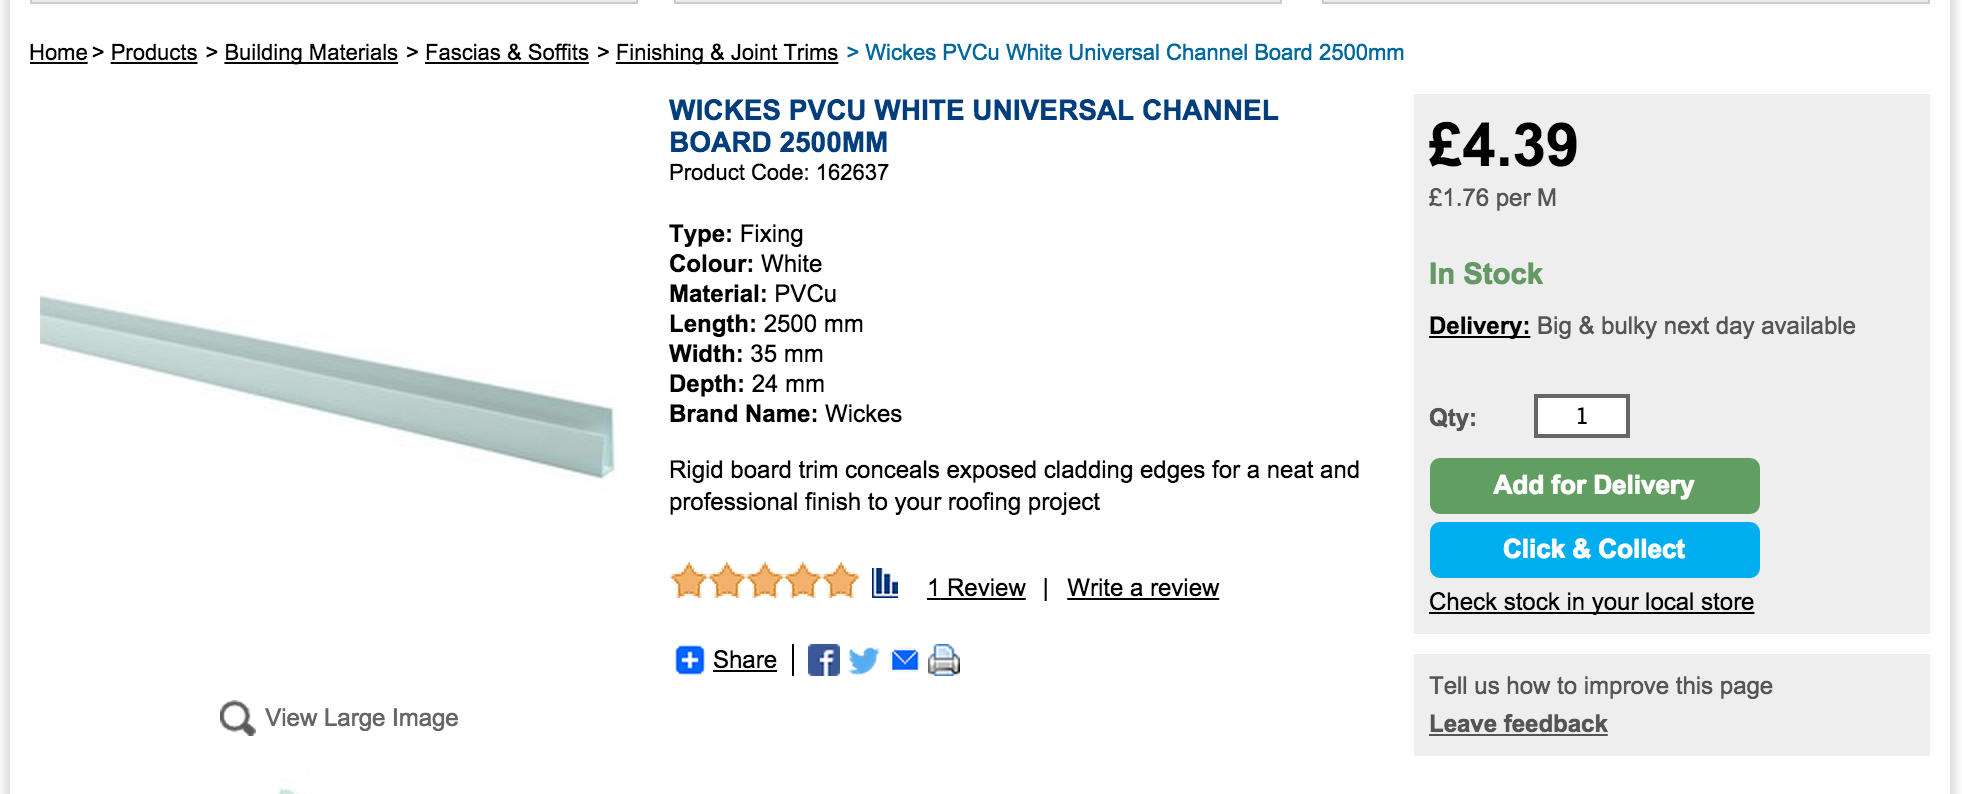
http://www.wickes.co.uk/Wickes-PVCu-White-Universal-Channel-Board-2500mm/p/162637
It seemed perfect, so I added the link to the appropriate page on OneNote and called it a night.
Move forward to Good Friday and I awoke feeling fresh and productive so decided to tackle this project. After double checking my local Wickes was open on Good Friday I jumped in the car to collect my comically large piece of plastic. Arriving at Wickes I found what I needed straight away and, after resisting the temptation to buy a new toolbox, headed to the tills for a nice surprise.
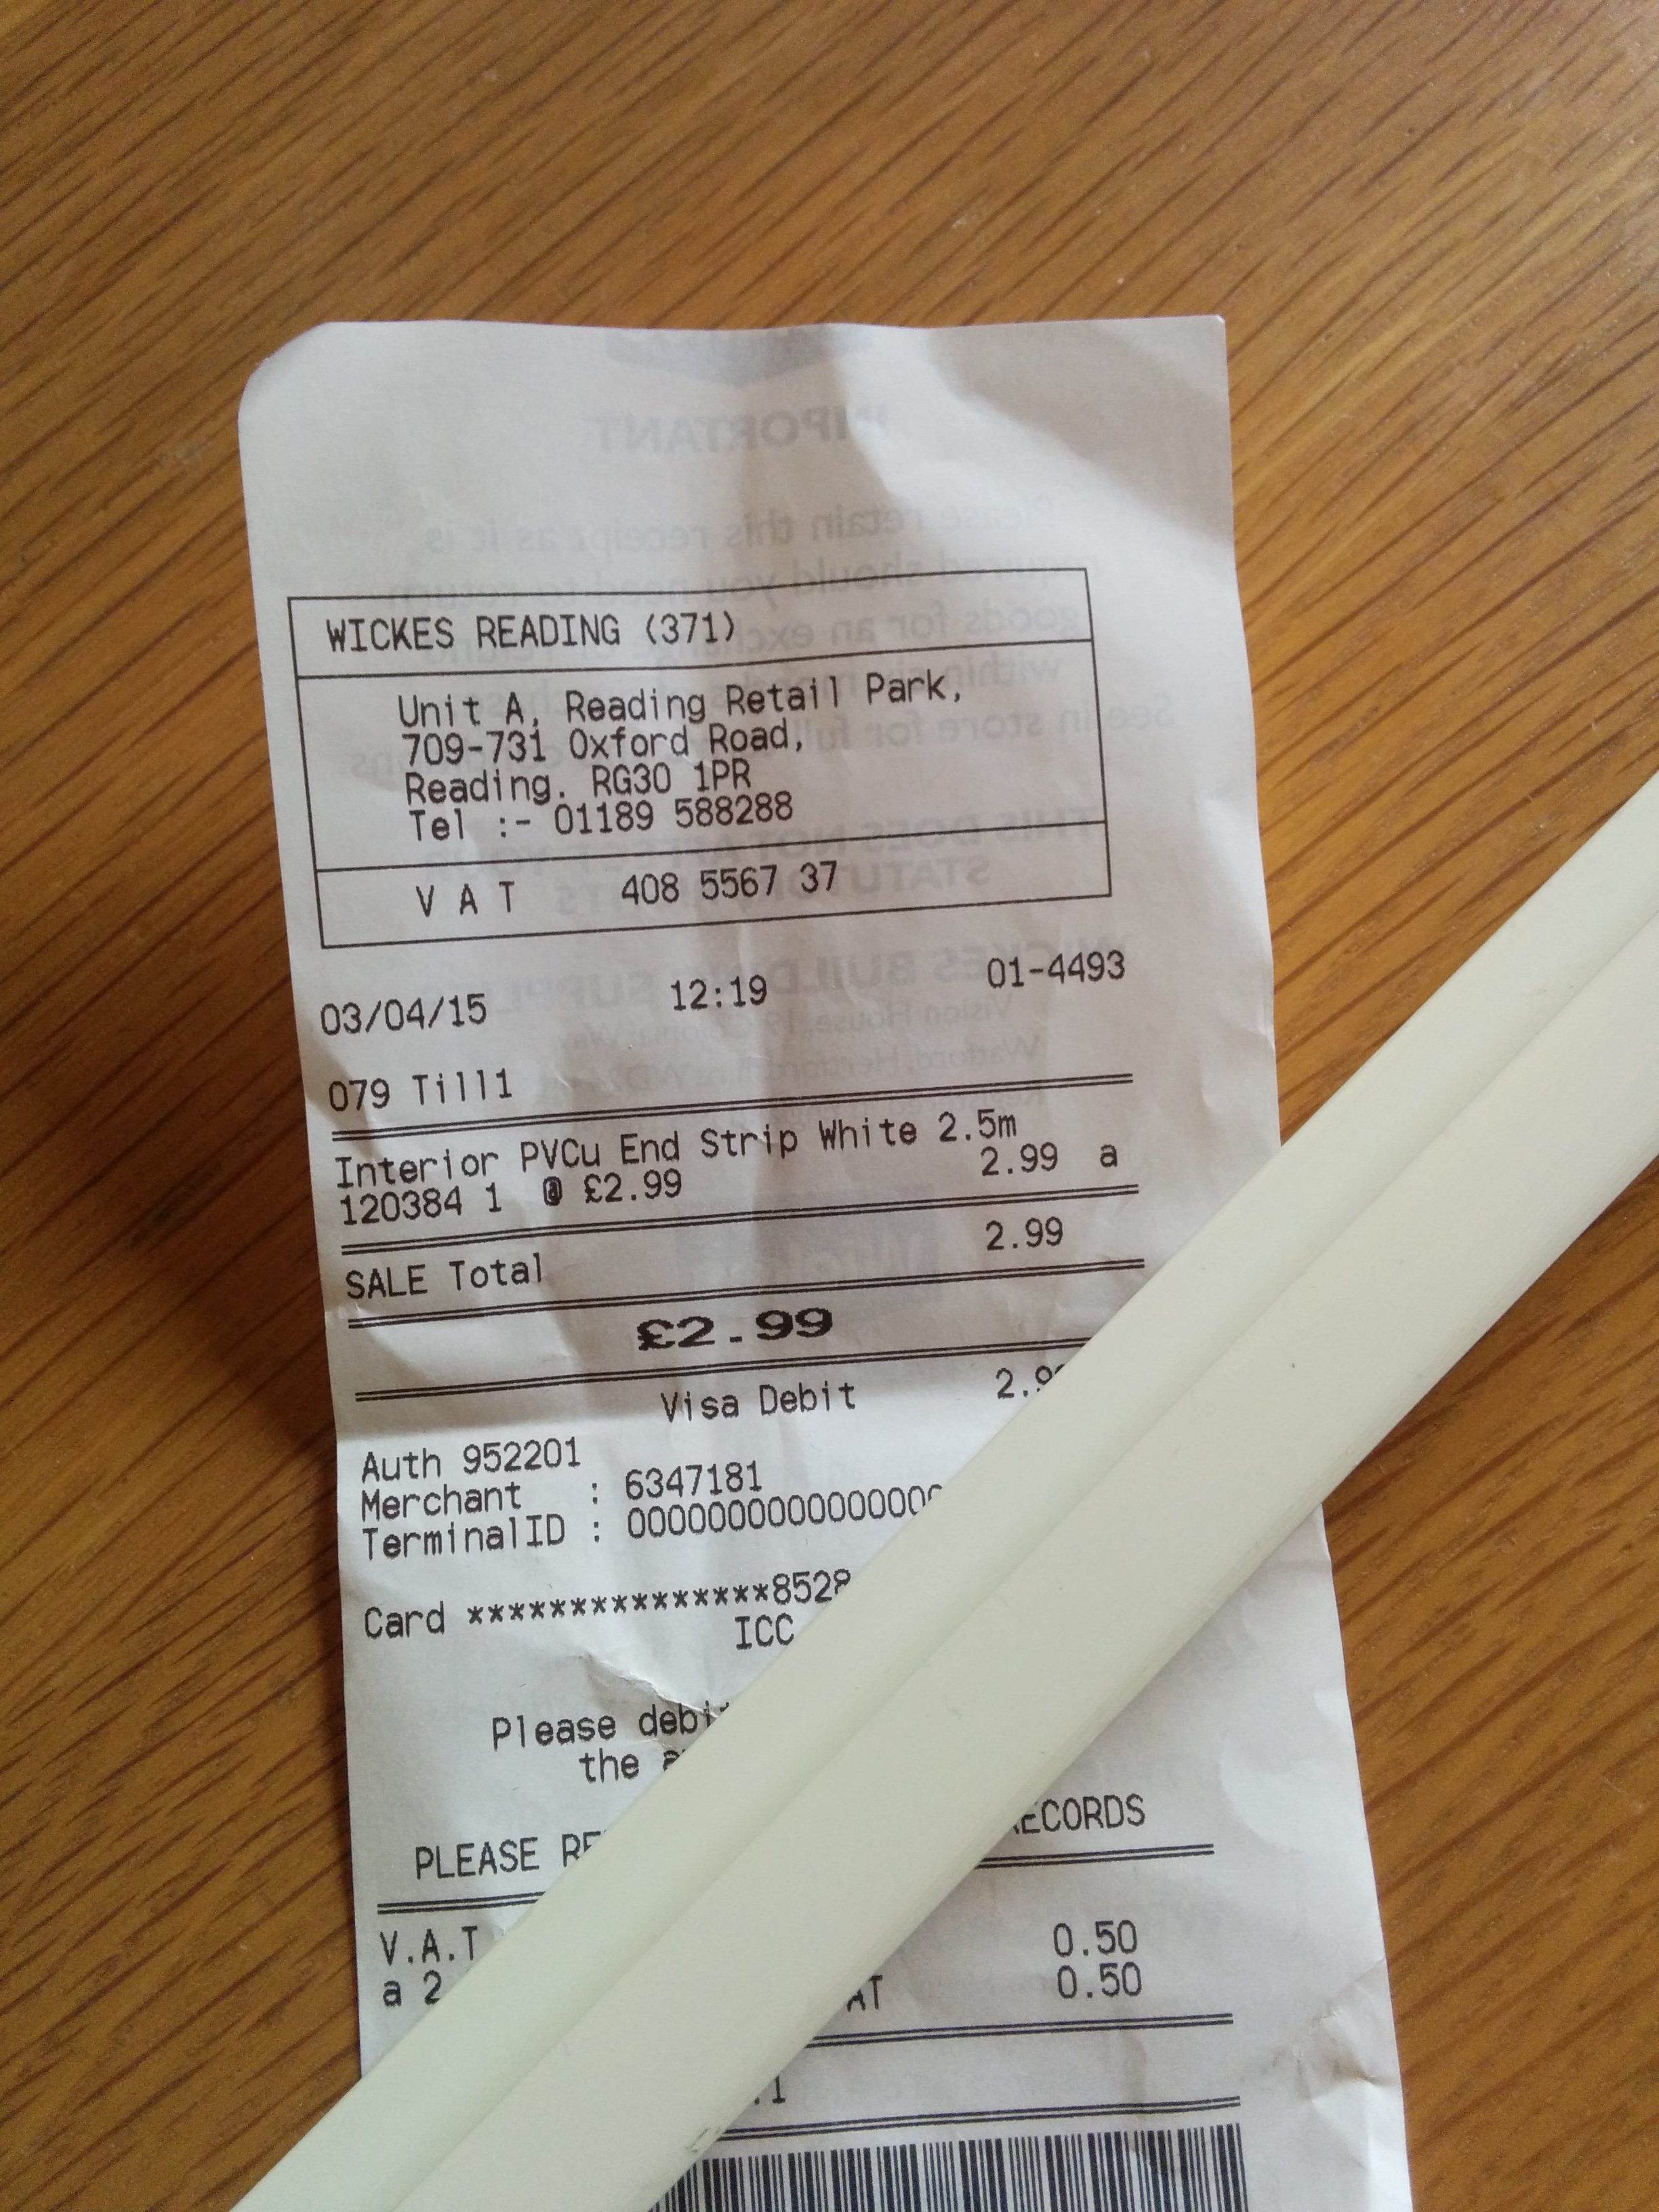
£3, bargain!
Getting to work
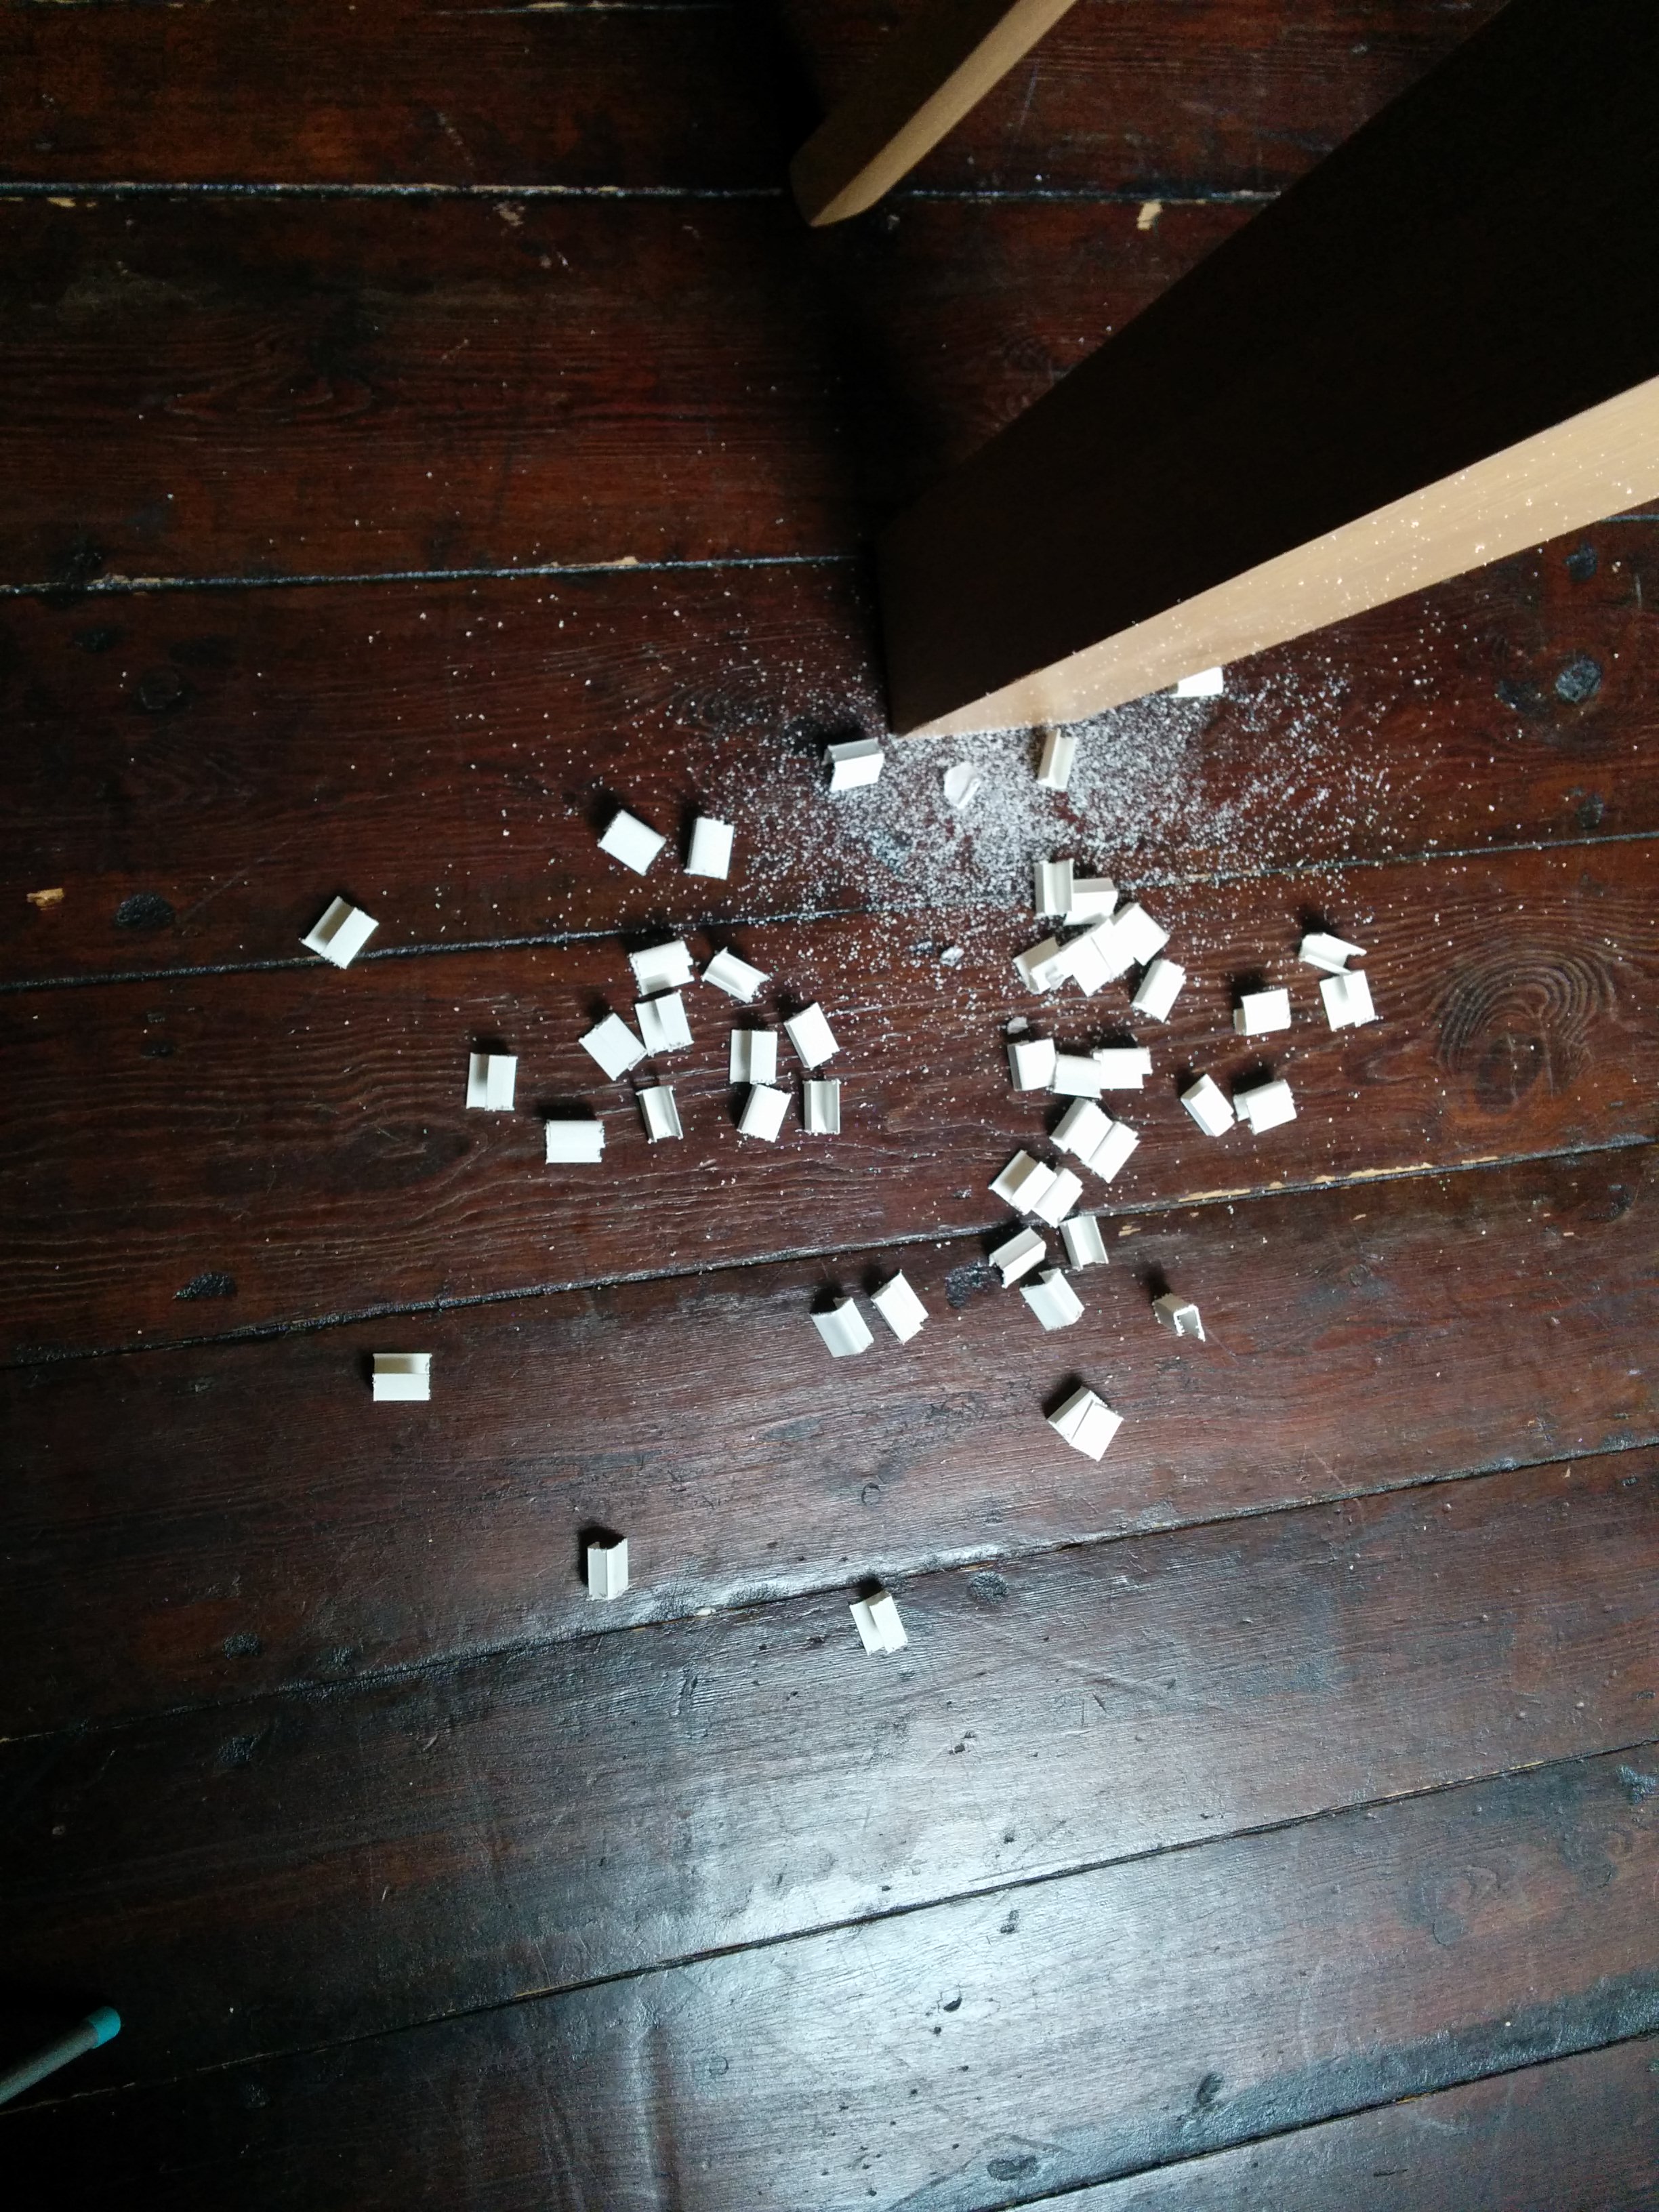
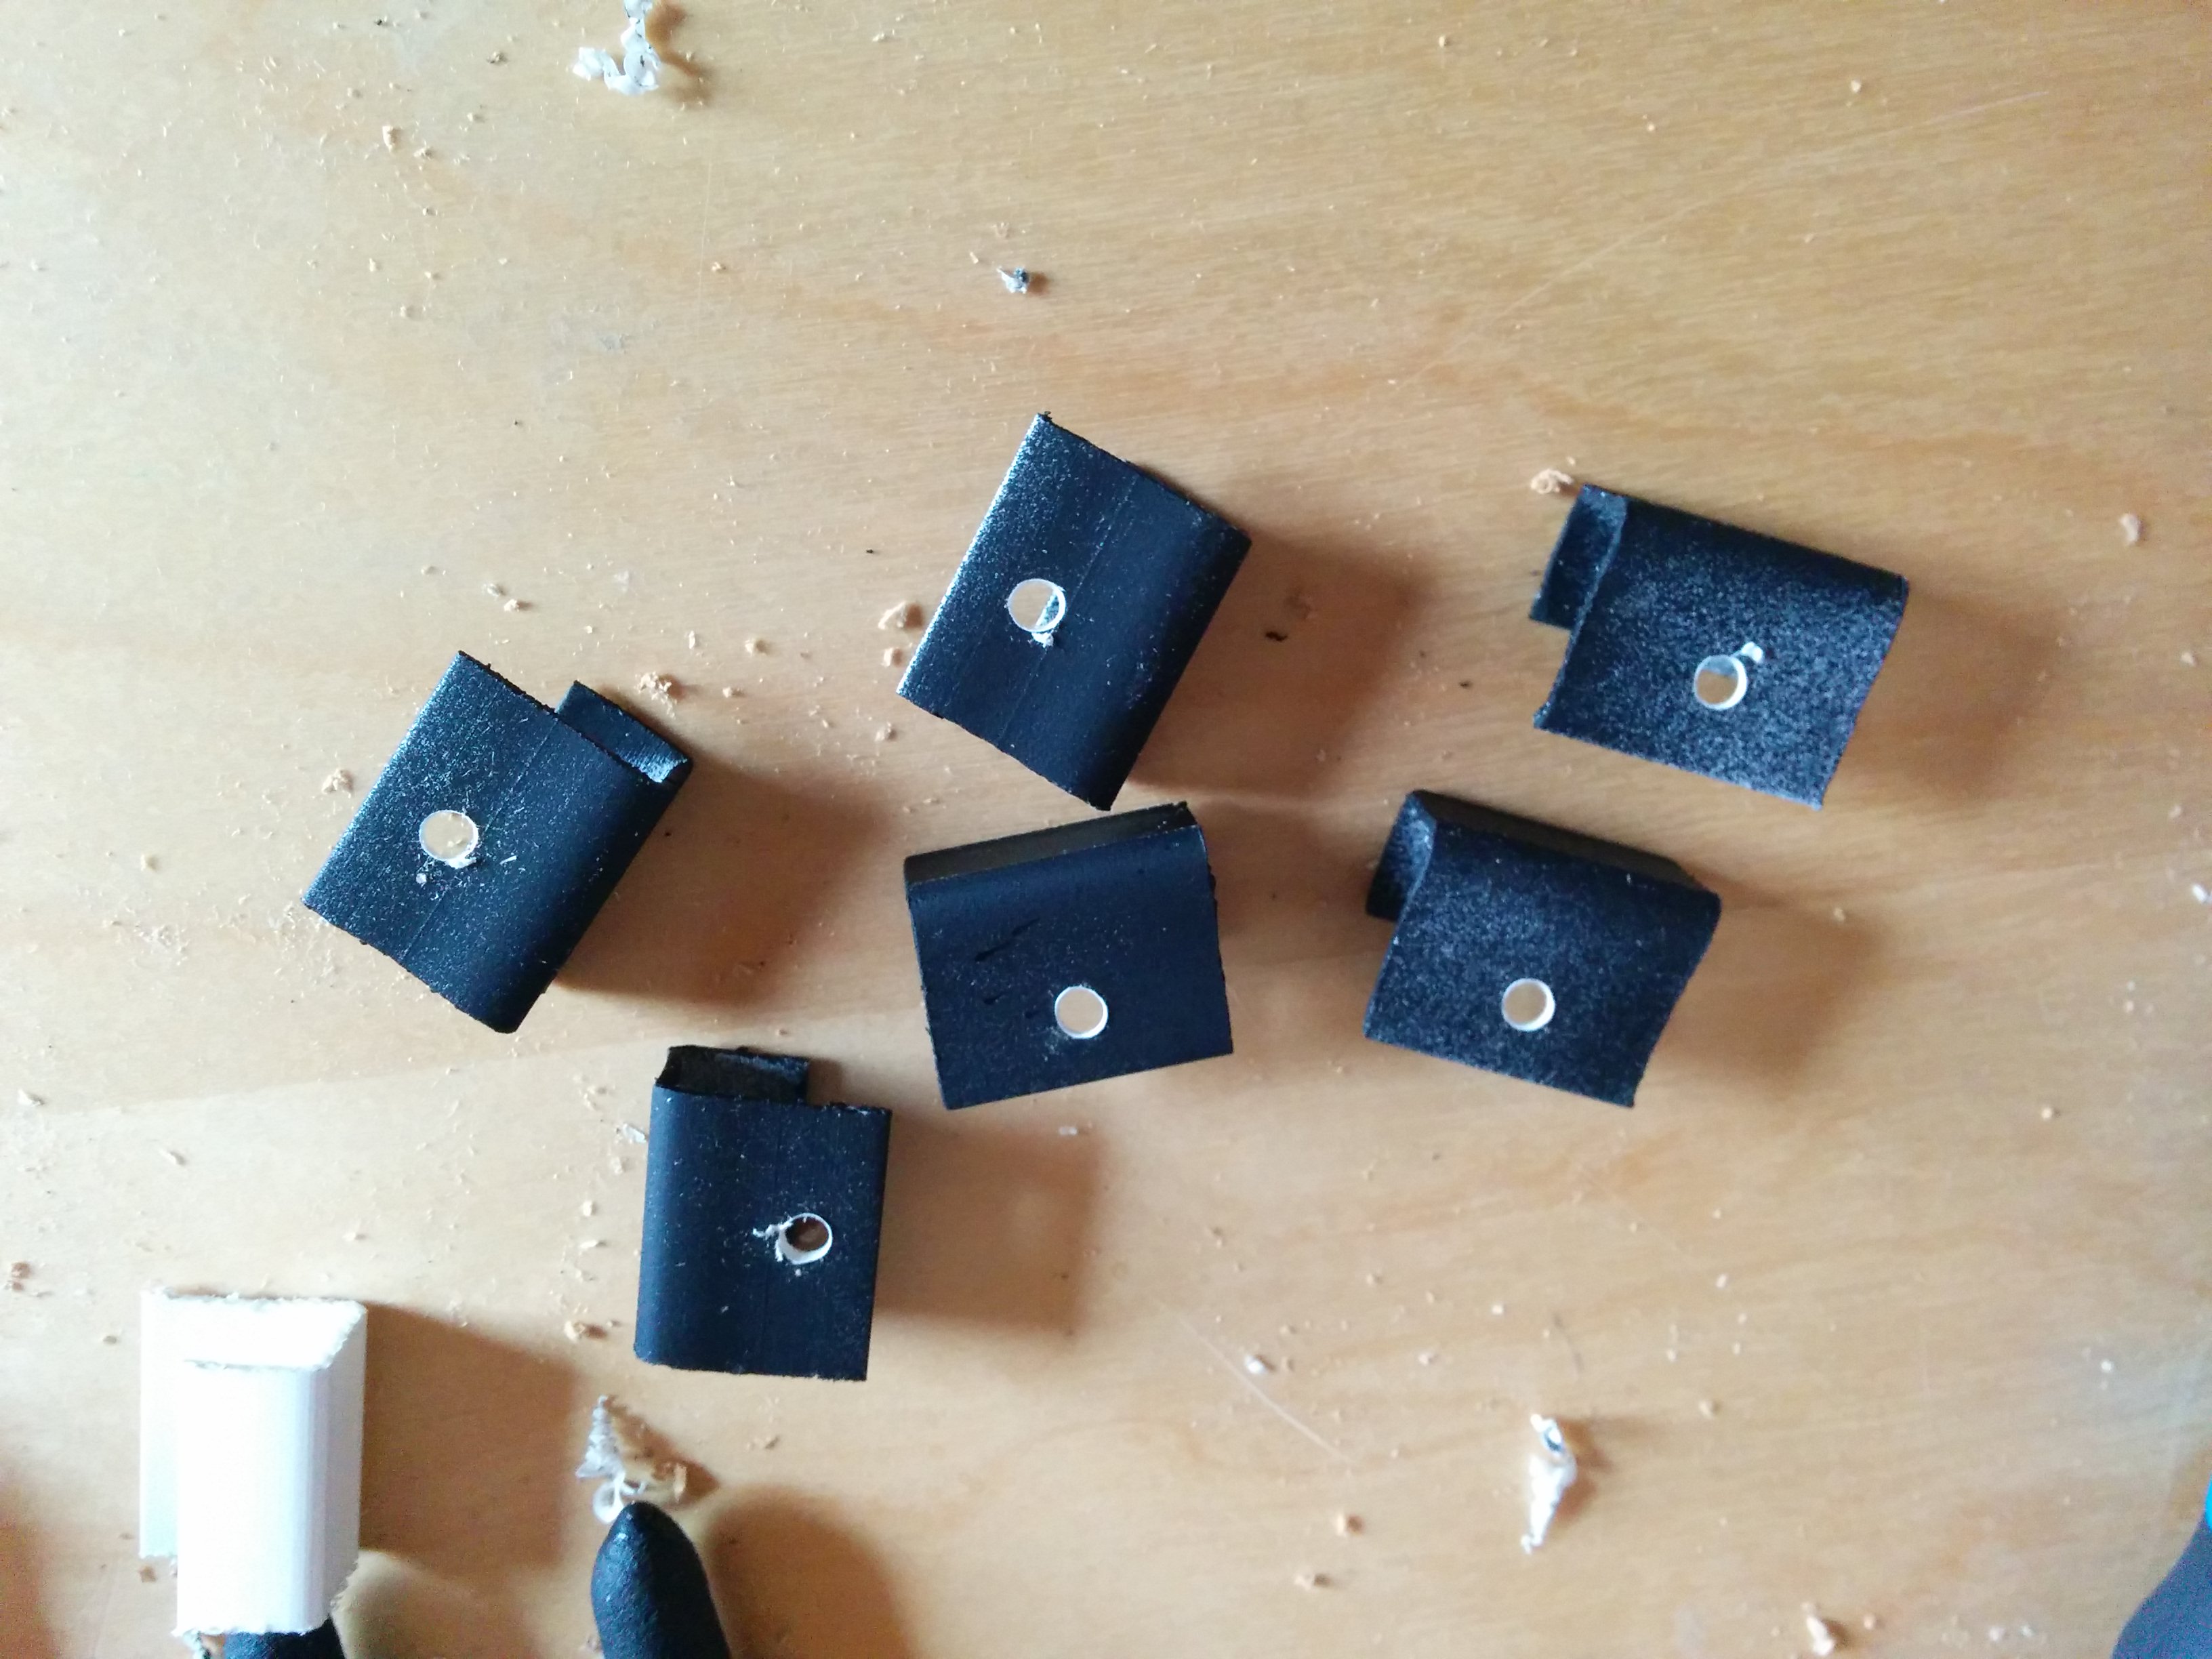
Now it was time to get started so I grabbed my hacksaw and cut myself a few sections off to help decide on an appropriate size. After a grabbing the closest record and figuring out the best size I started cutting away and making a nice mess.
Now I wasn’t too keen on the white and luckily I had some black spray paint left from a previous project. So, after some monotonous sanding and filing, I gave them a good coating.
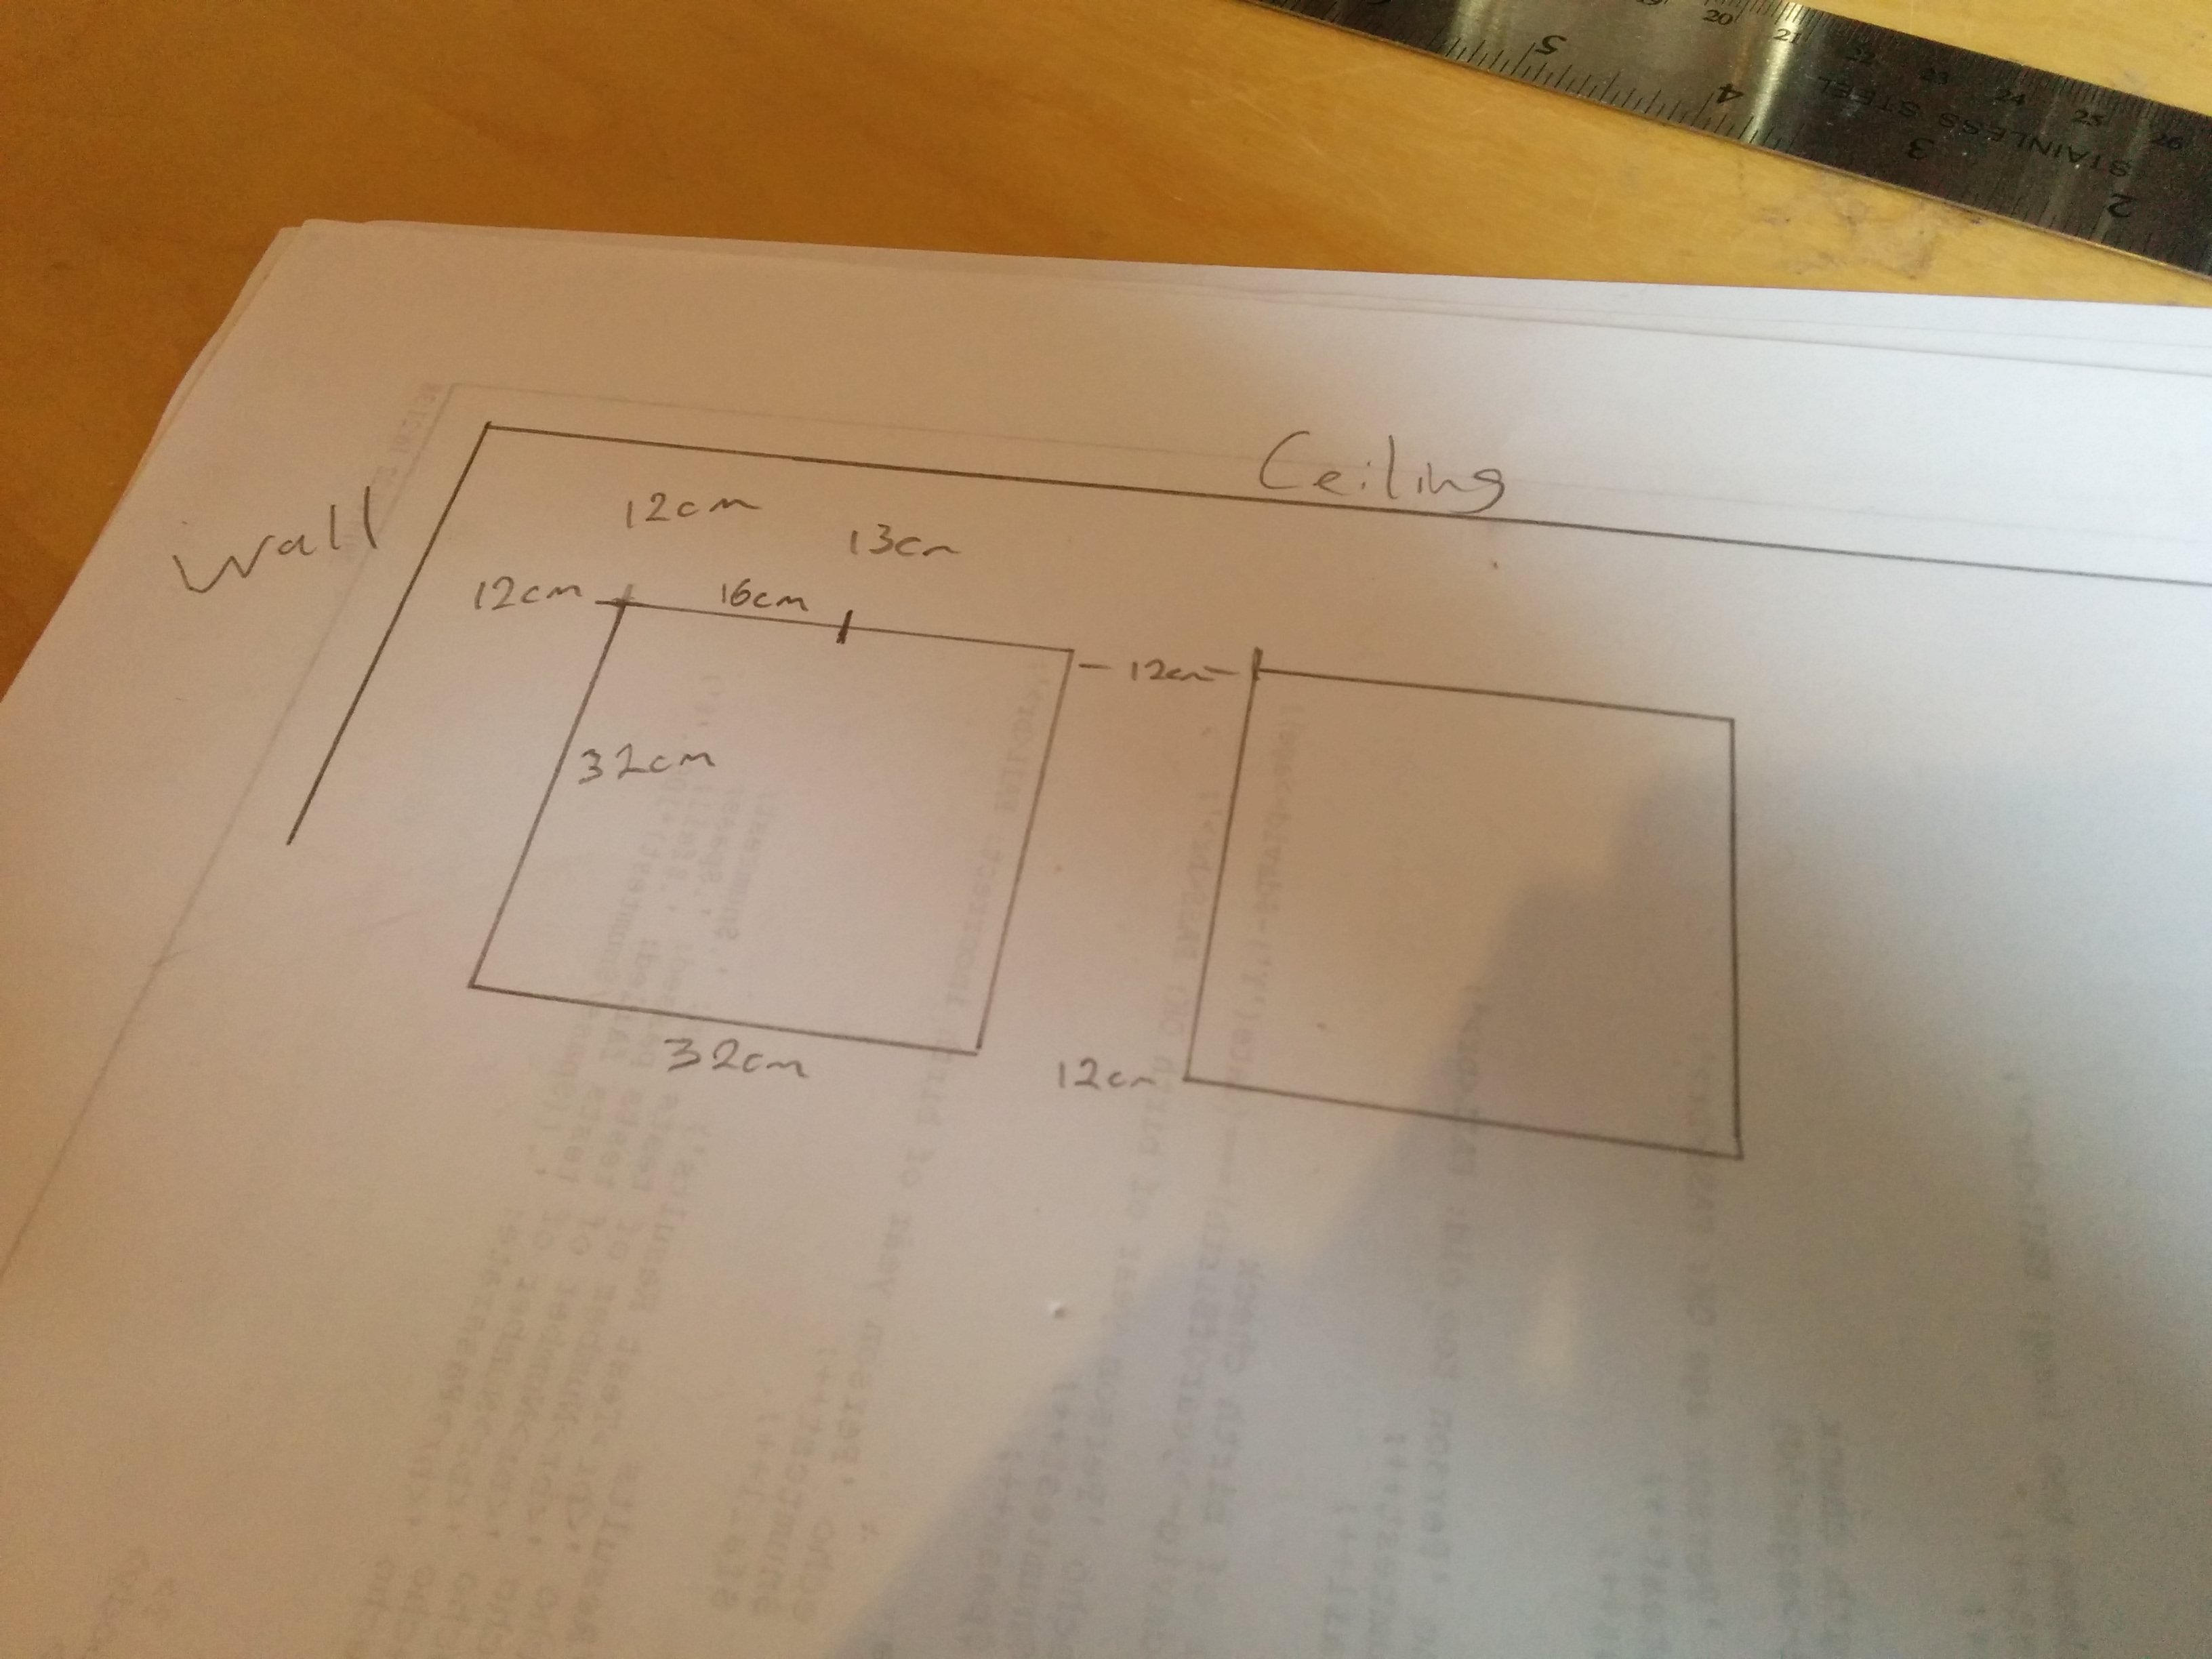
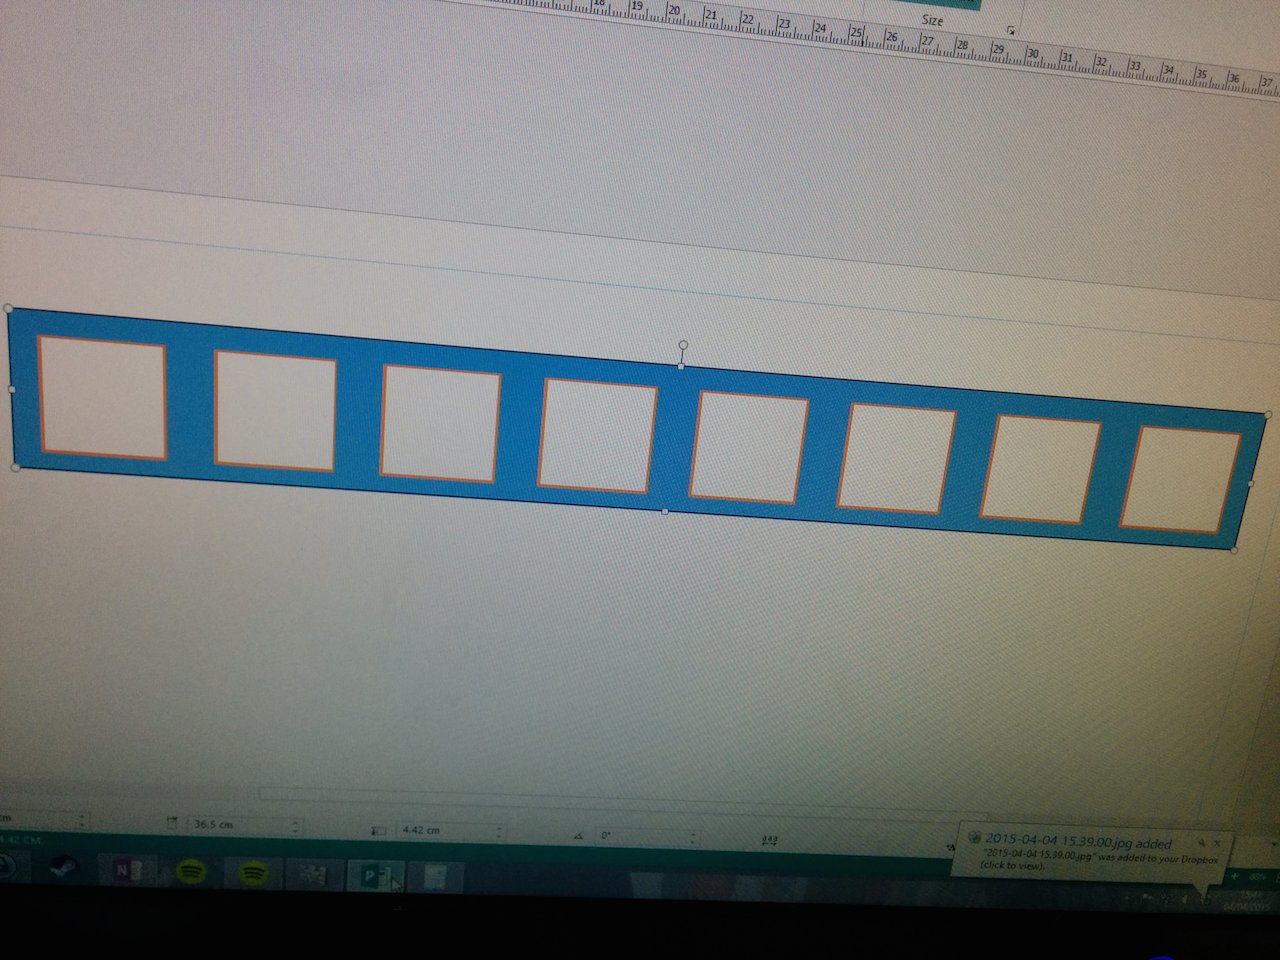
While they were drying I broke out the tape measure and did some quick calculations, both digitally and by hand to figure out the spacing of them.
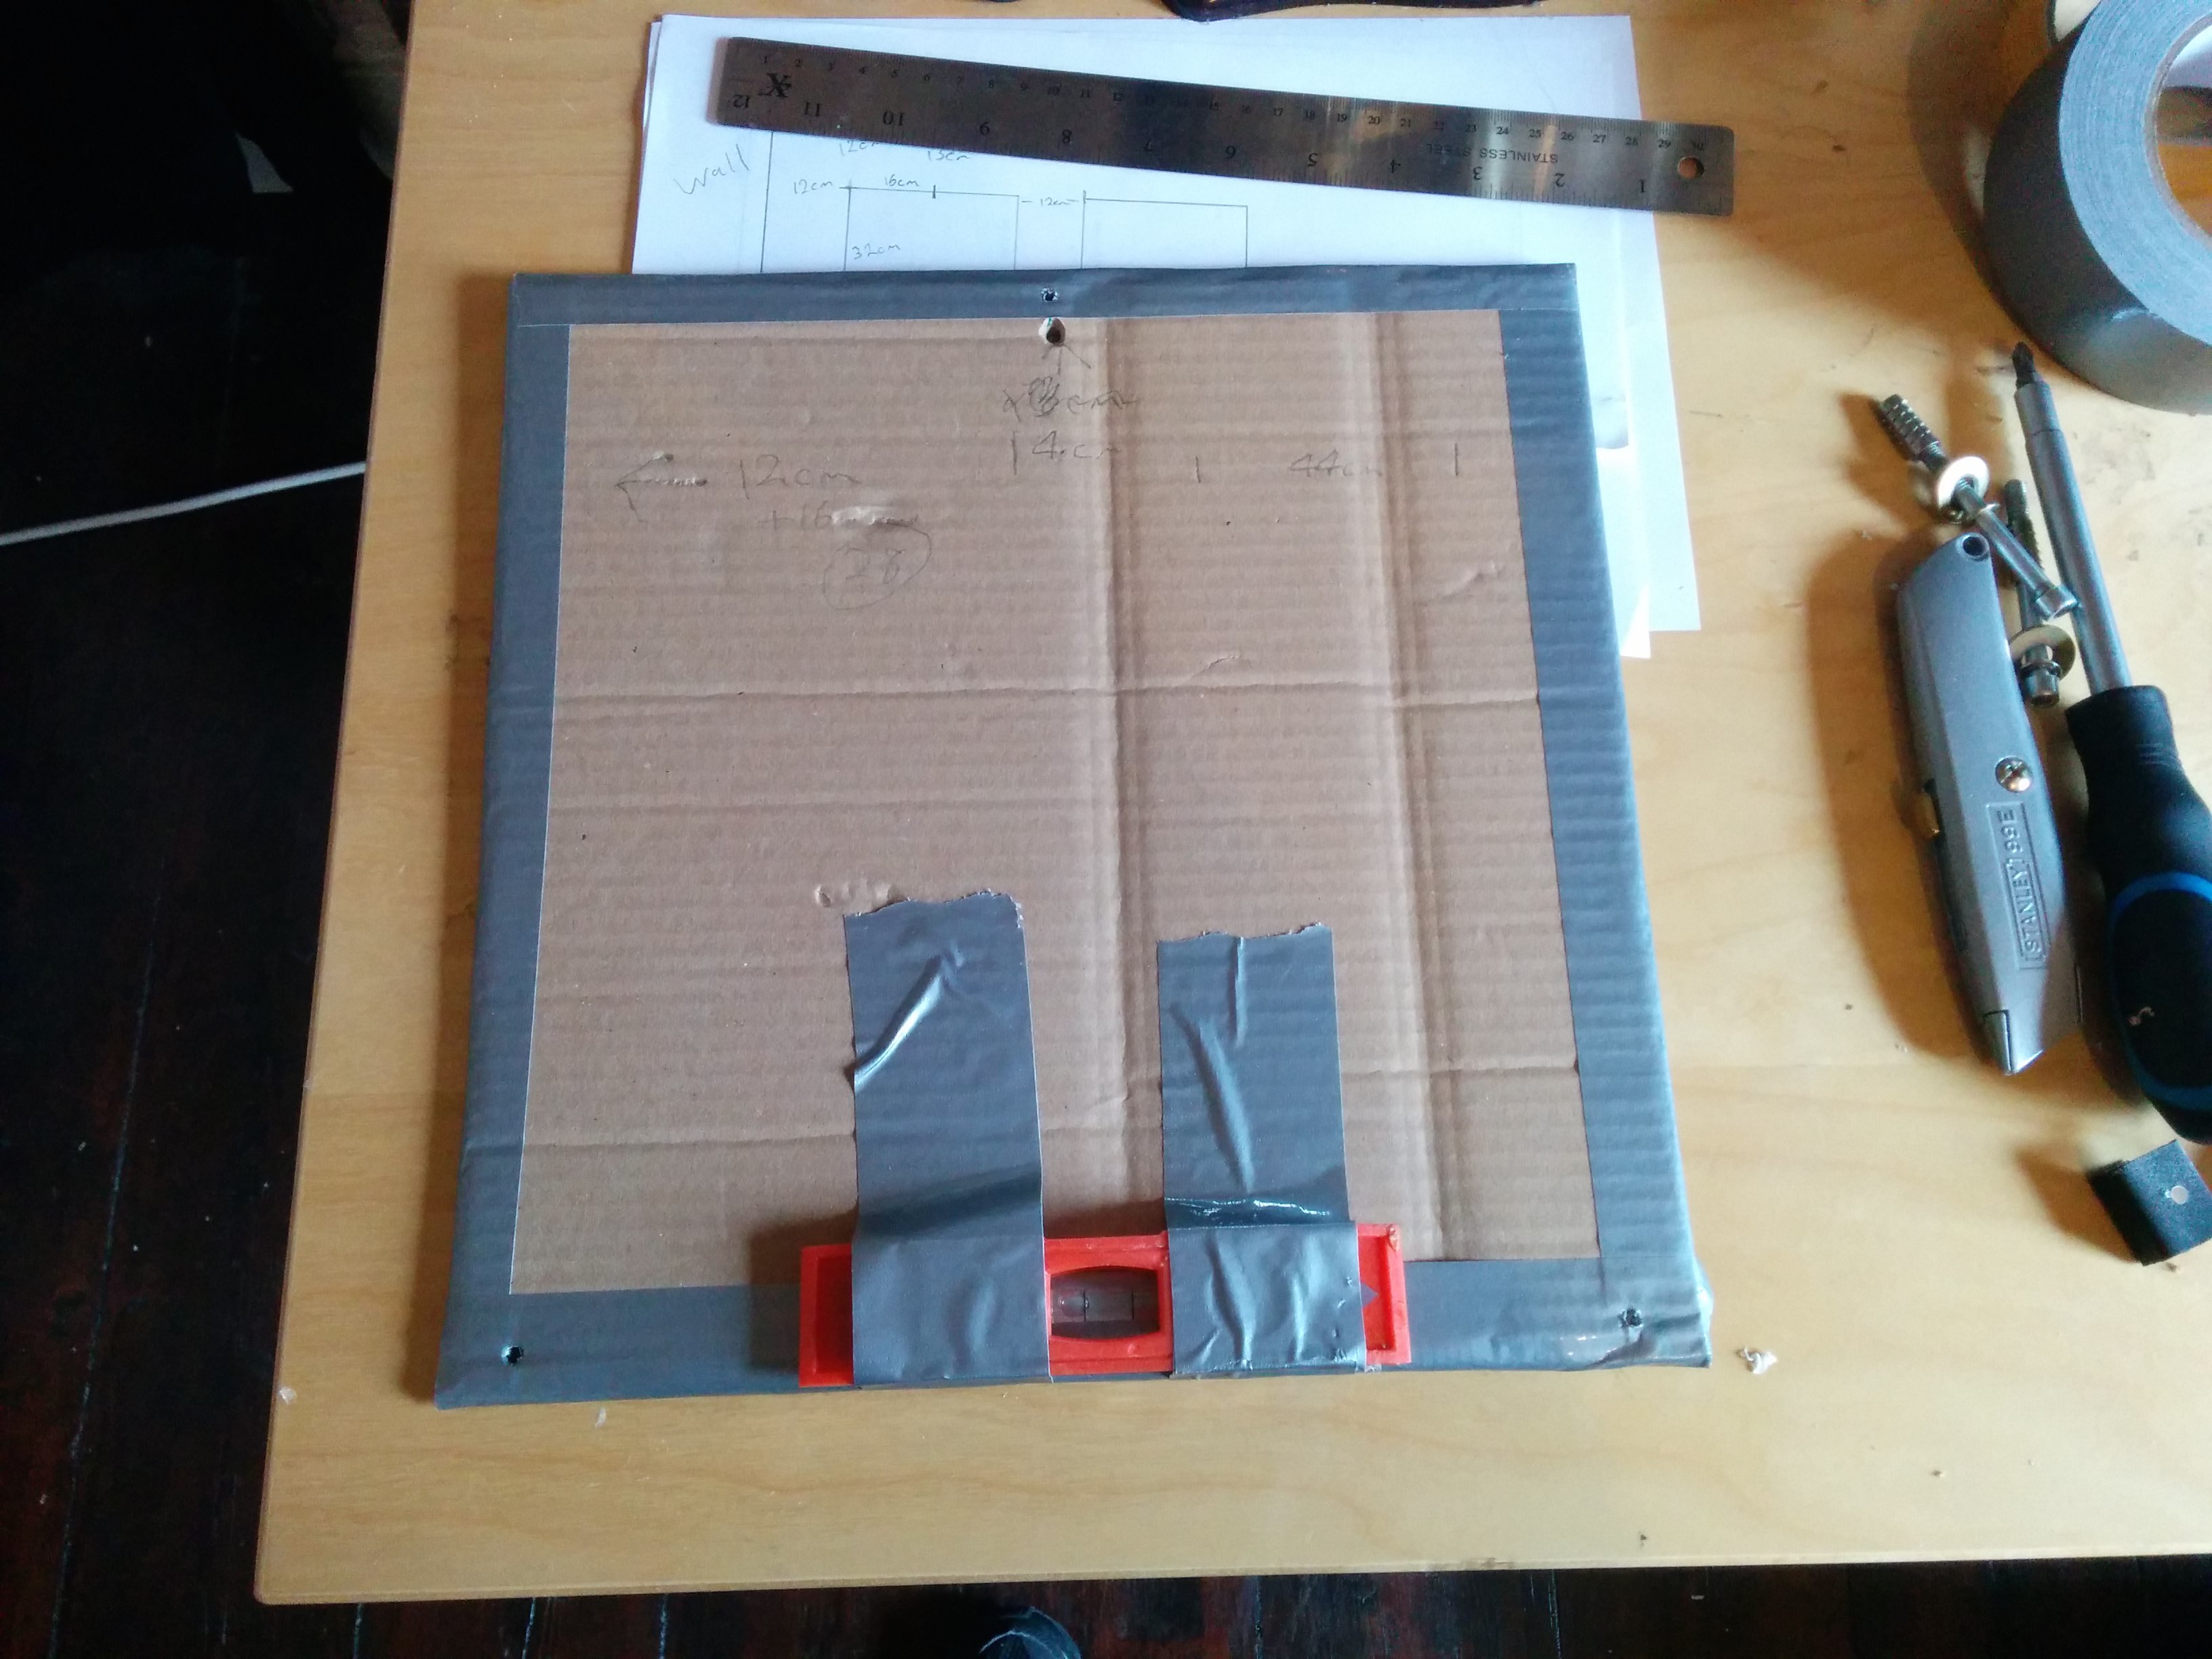
Then, after some thought, I chose to make myself a jig/guide/template thing. This, along with an auto centre punch made the whole job a lot easier.
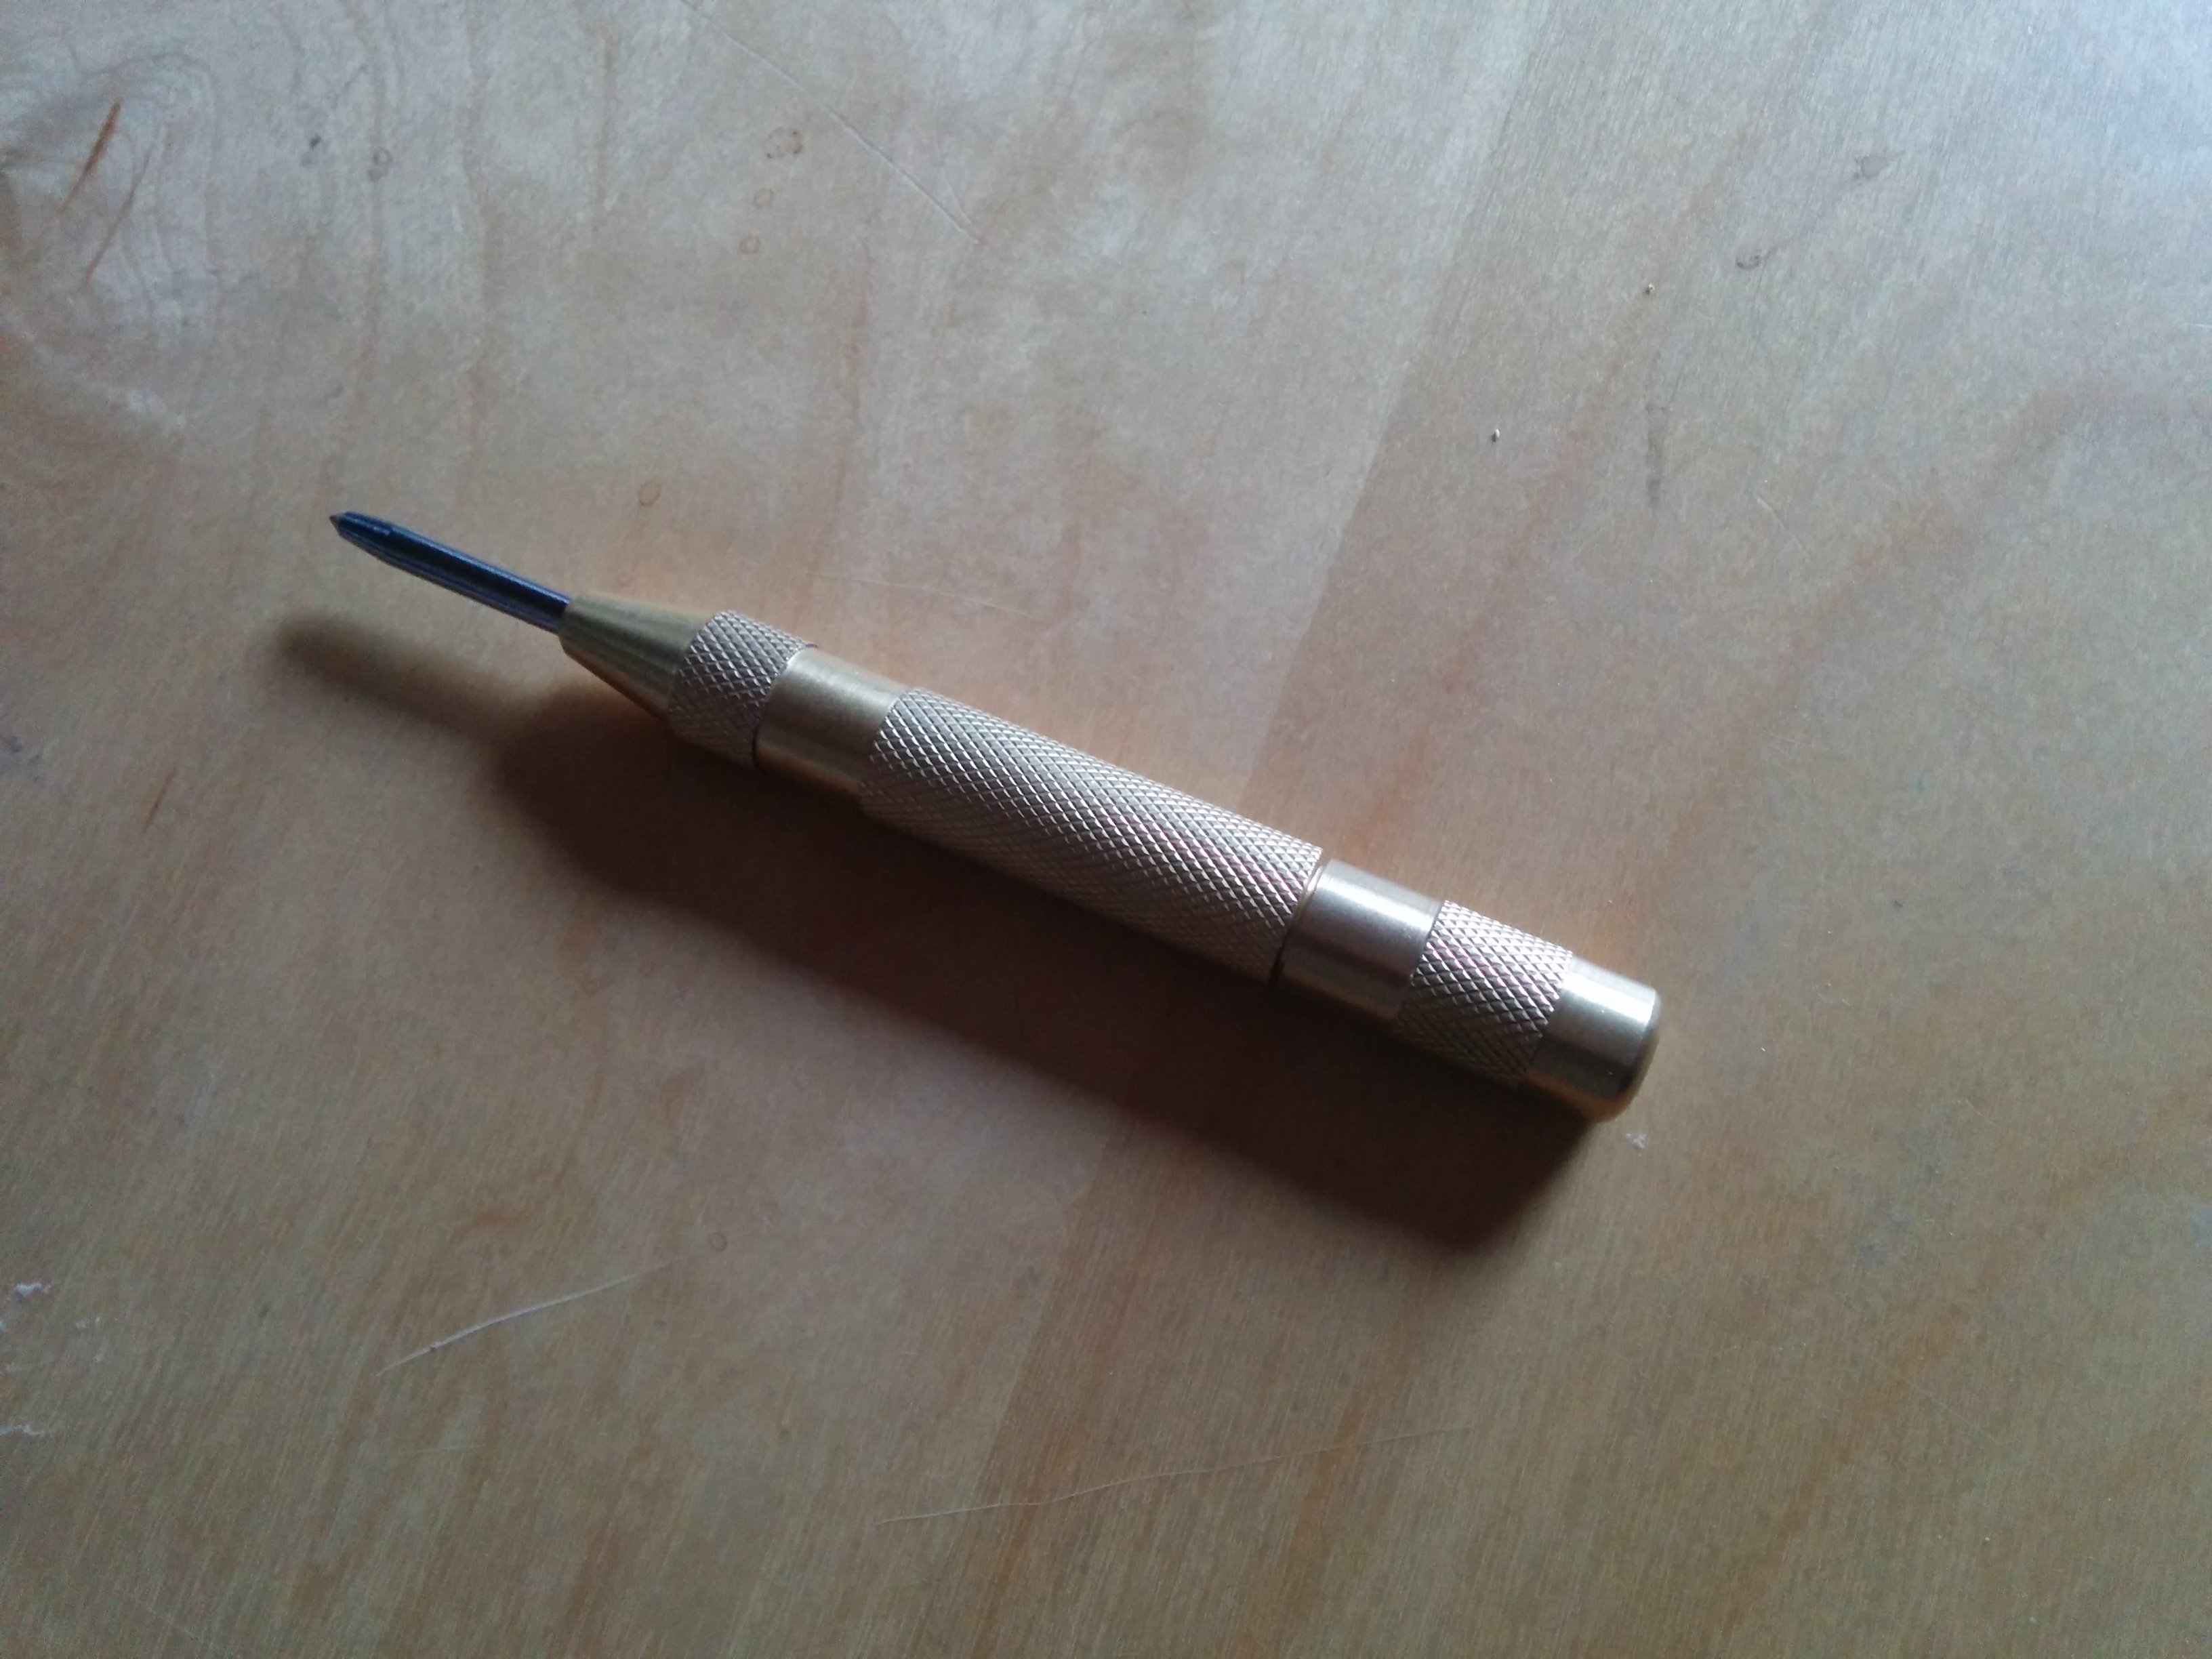
Once the paint had dried all I had to do was drill some holes in the plastic bits and I was ready to start doing things that I really shouldn’t be doing to a rental property.
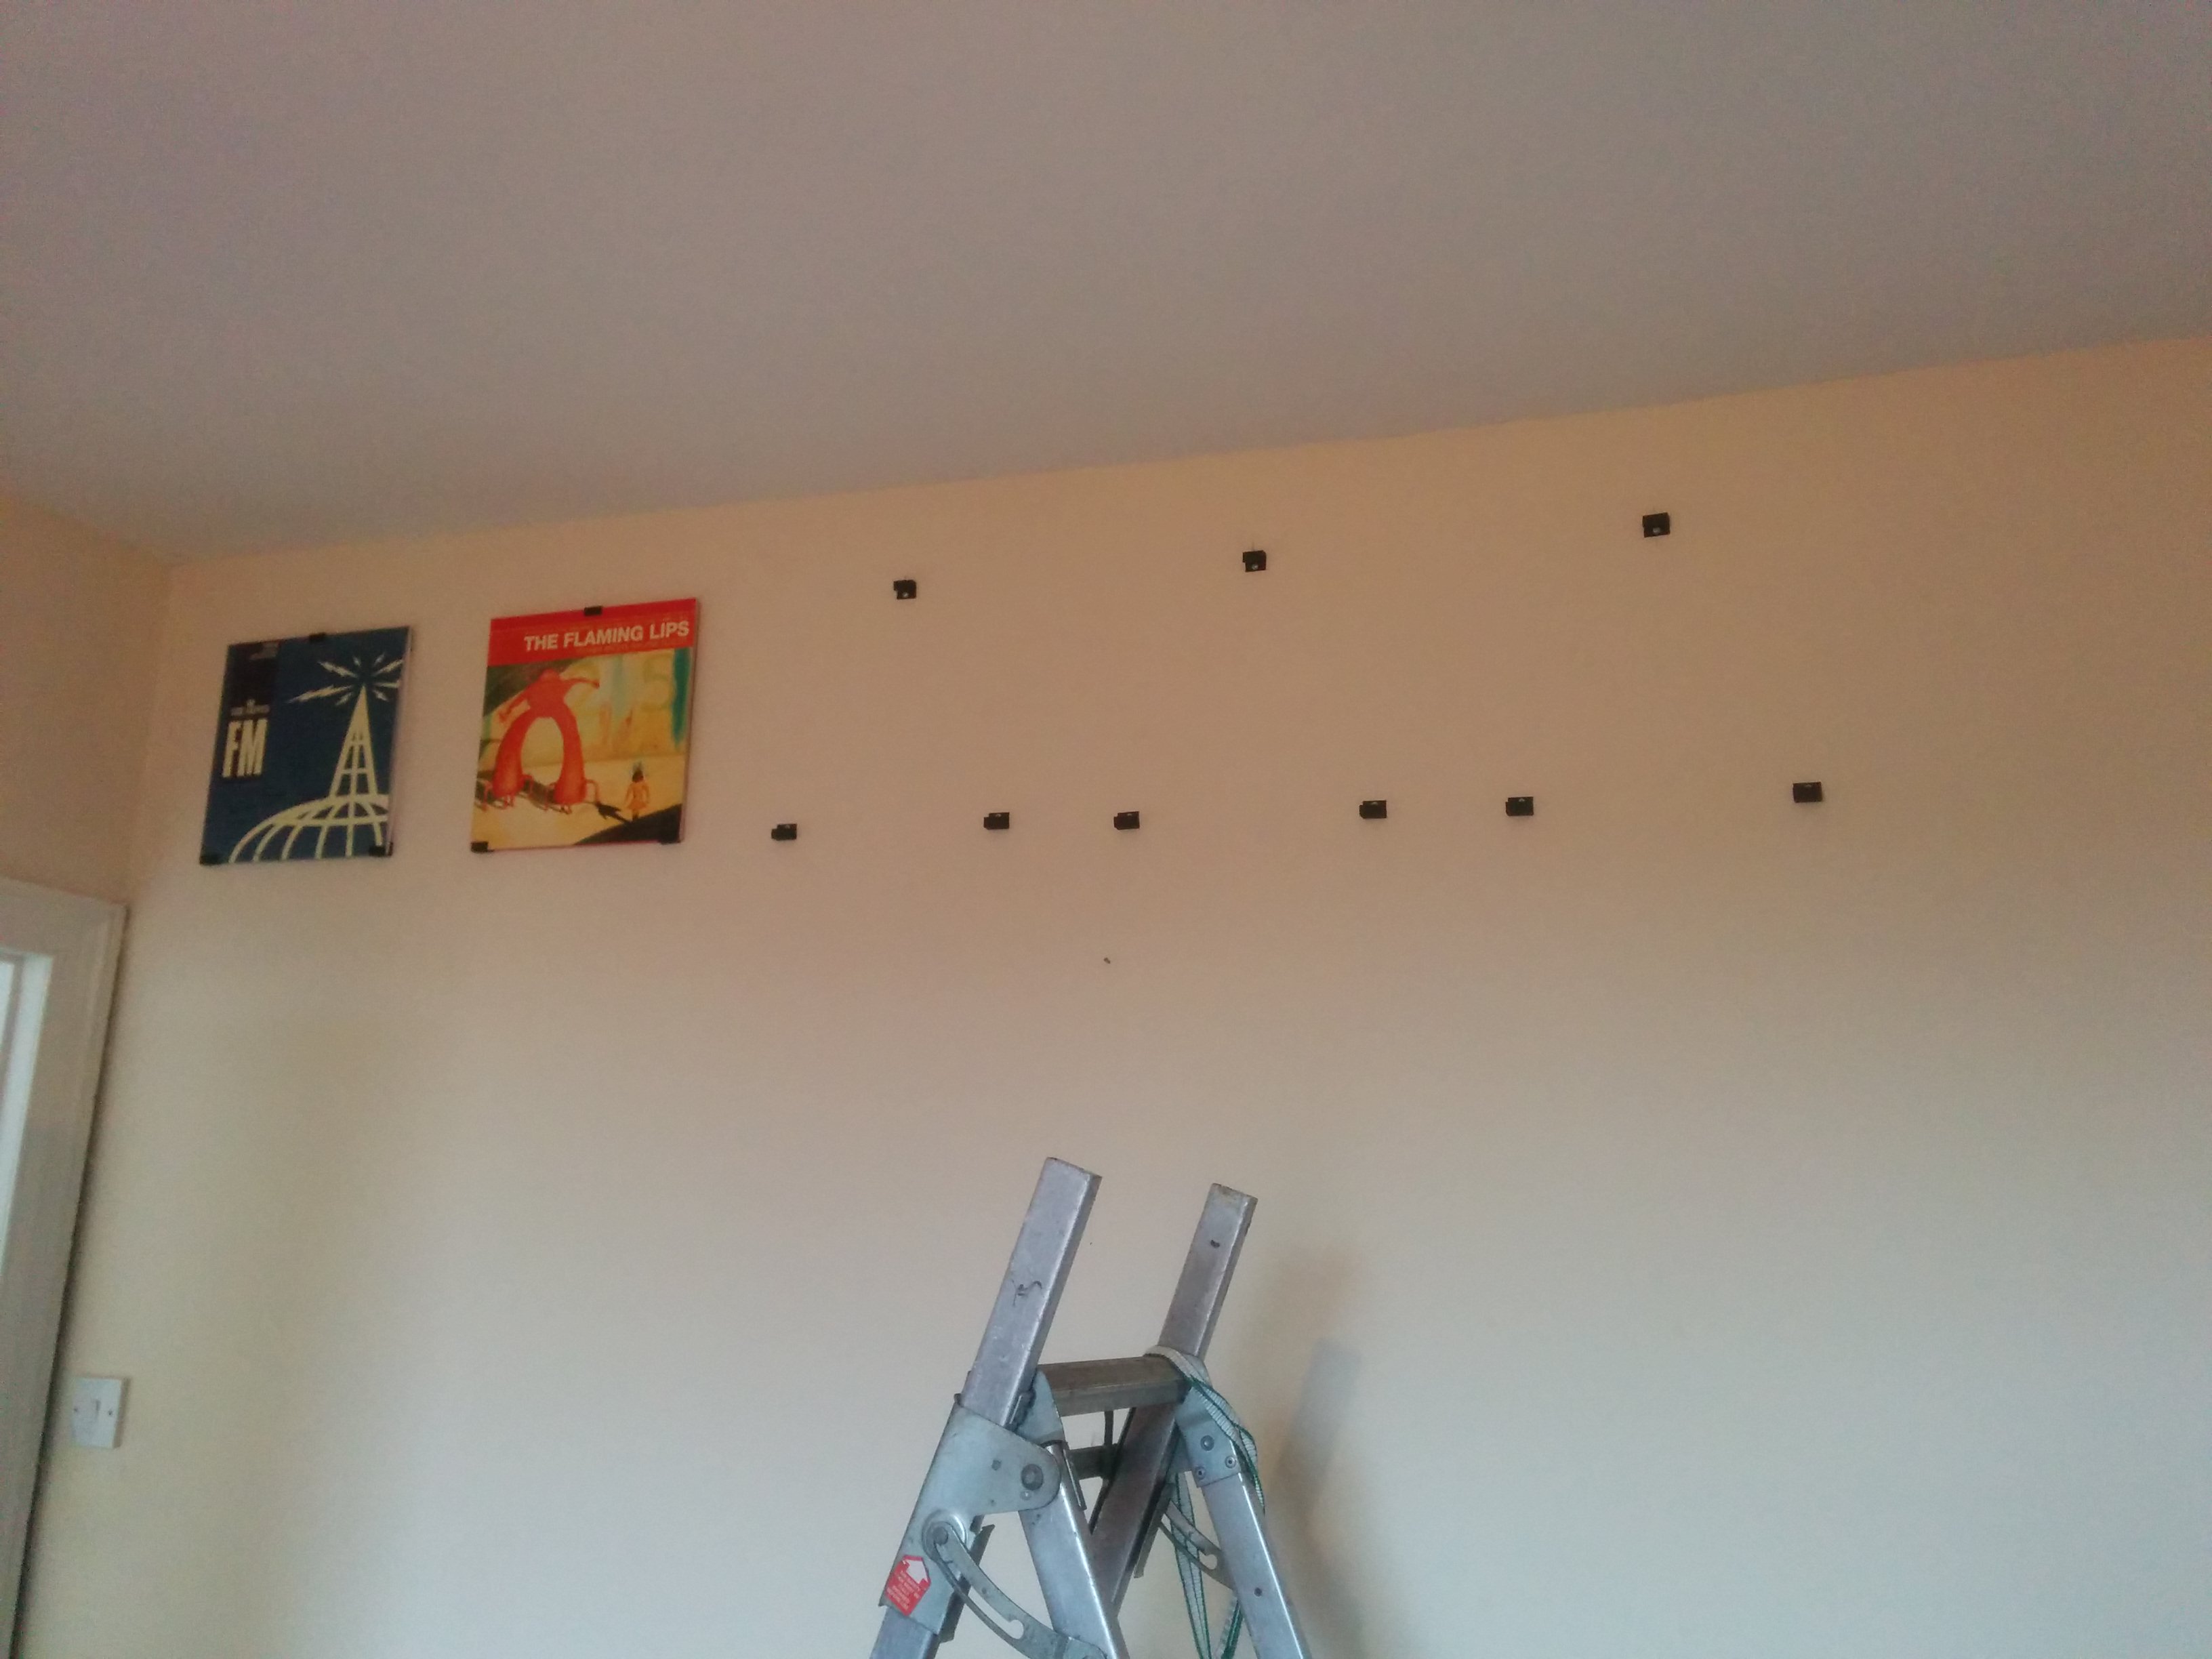
Now my process for this was as follows…
- Measure from know left marker (either wall or previous record) and mark vertical line with pencil.
- Measure down from ceiling and mark horizontal line with pencil.
- Auto centre punch where these lines cross, this is where I will drill the hole for the top piece.
- Put pencil through top centre hole on my cardboard jig.
- Place pencil tip into previously made punch mark.
- After ensuring jig is level, punch marks for bottom corners through holes on jig.
- Drill holes at marks and pop in wall plugs.
- By hand screw one of my plastic things to the wall.
- Repeat!
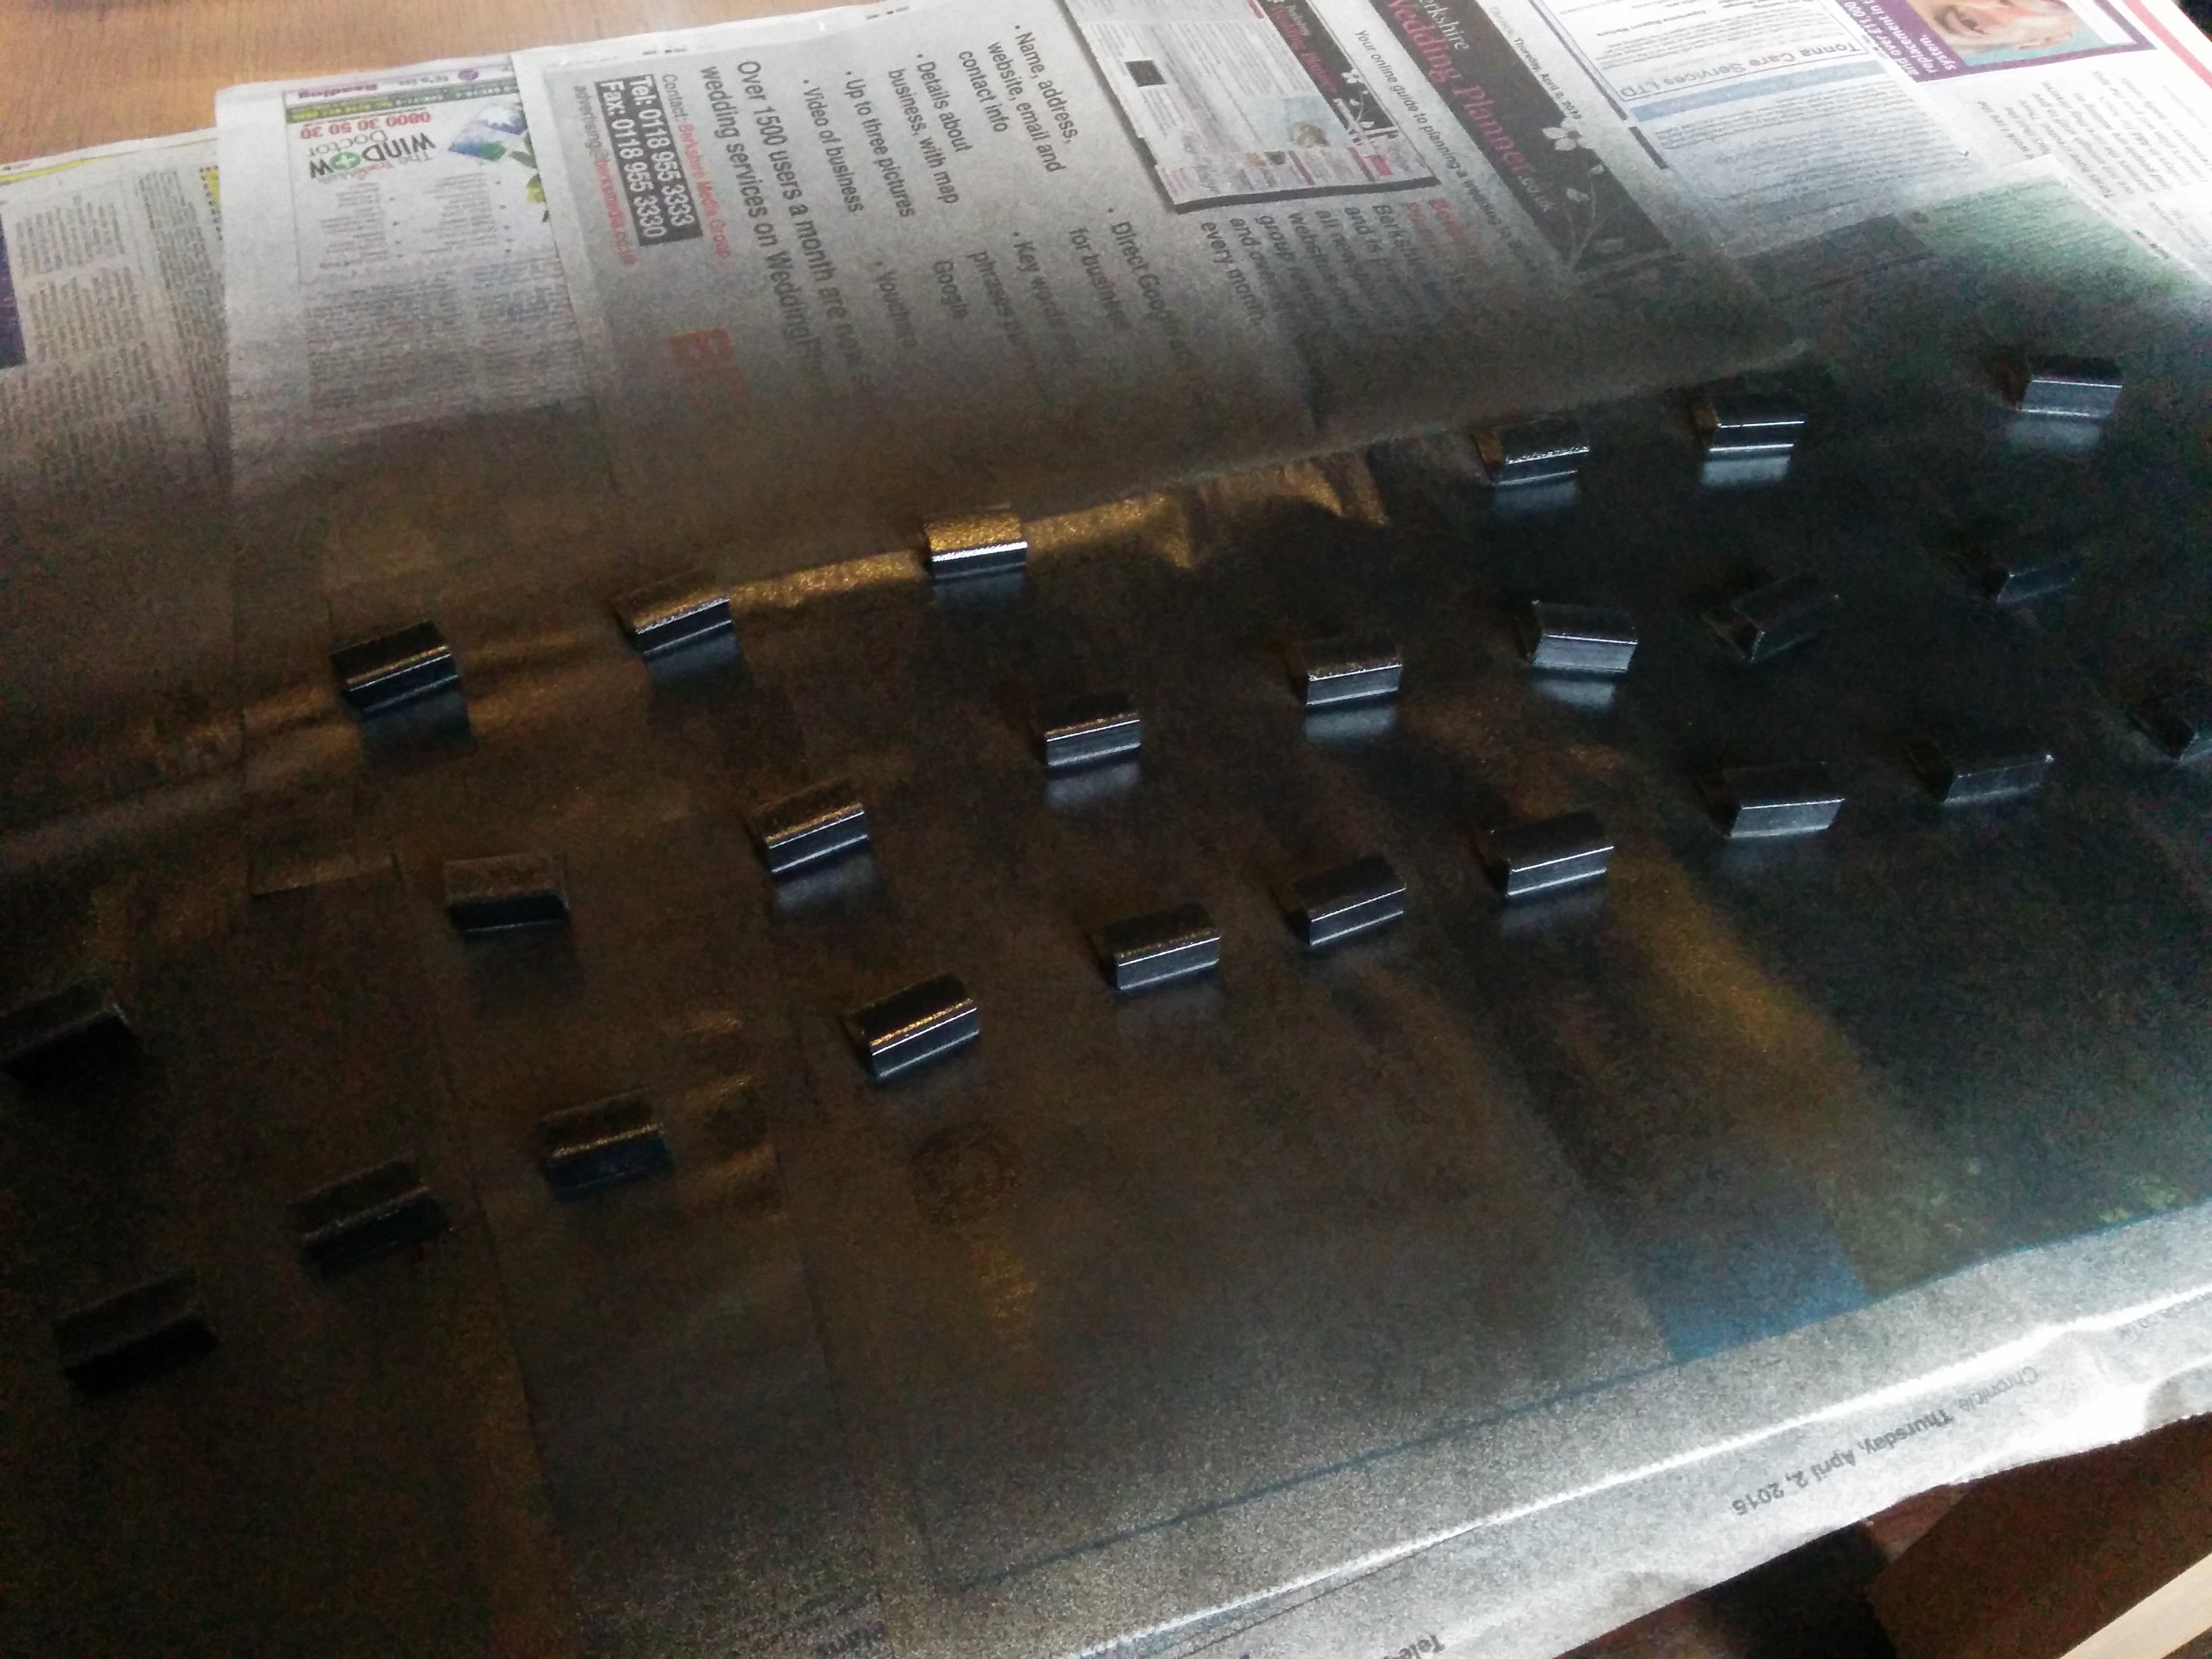
The final result is lots of these…
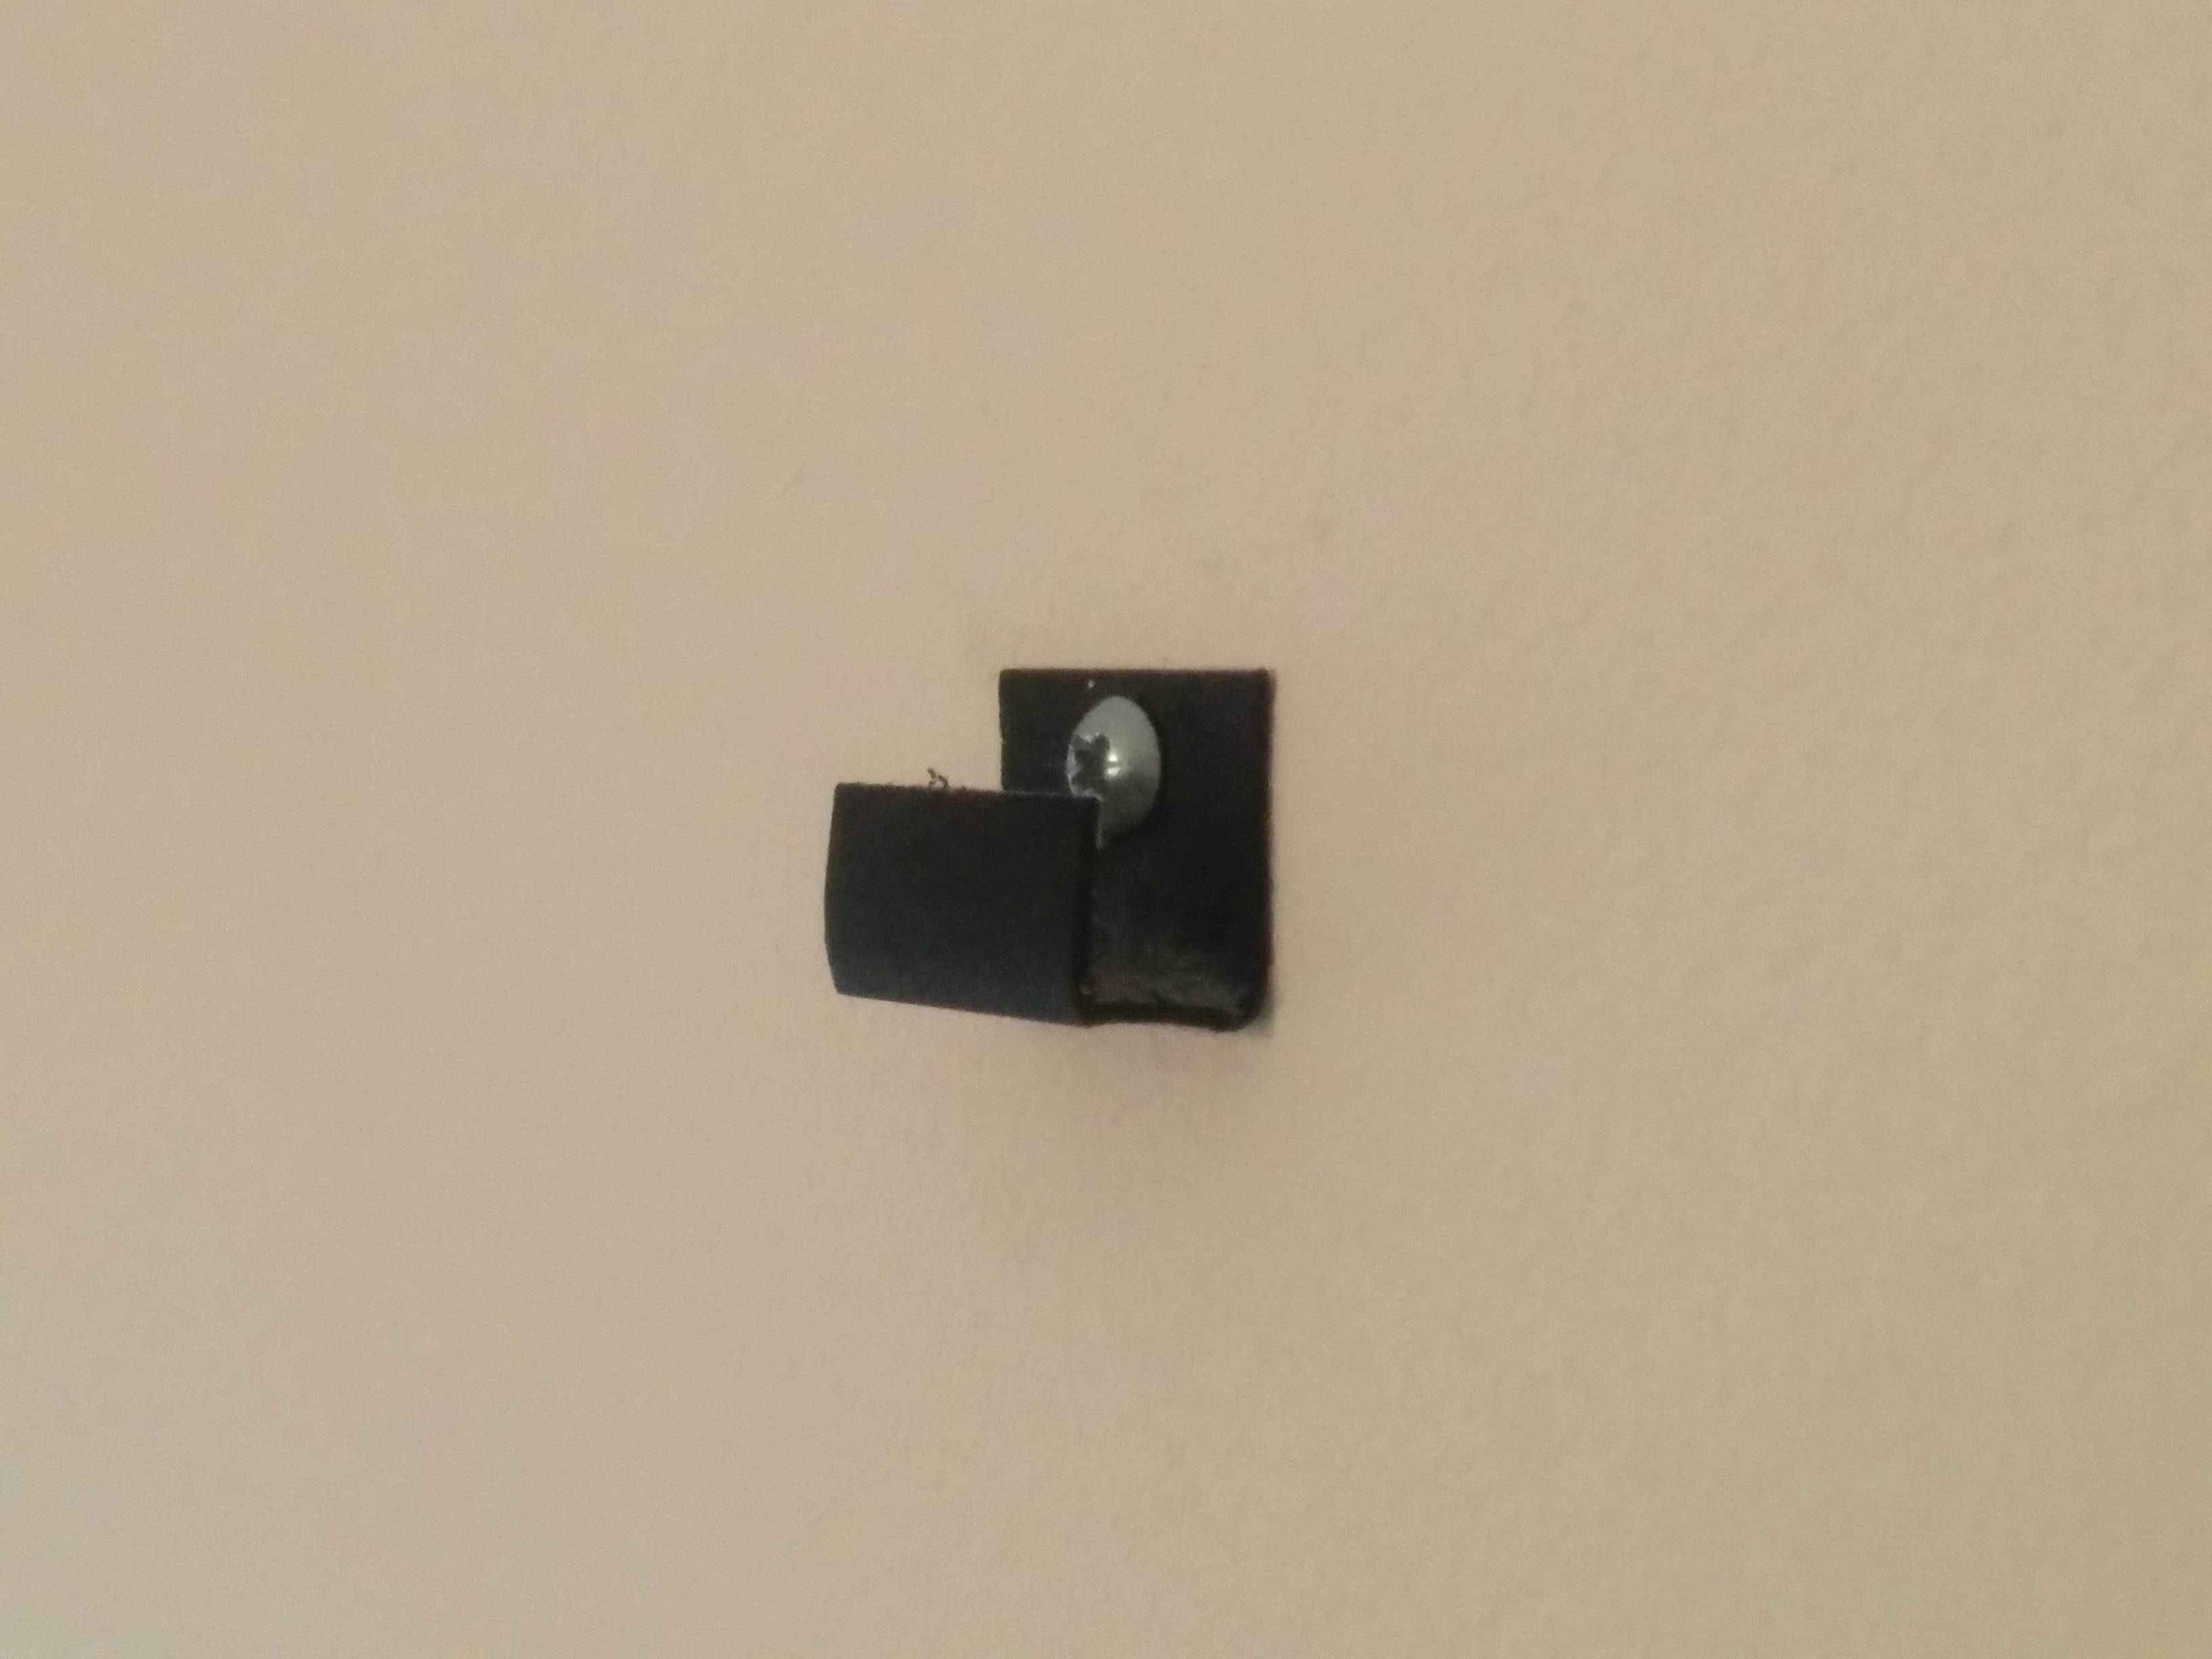
Notice that I chose to use dome headed screws in order to minimise the chance of damaging any of my records.
And that’s it! Happy Easter everyone!
David